Showing posts with label breakfast. Show all posts

Sunday, November 6, 2011

Super-Moist Pumpkin Muffins


I know I'm not alone in this, but I really do enjoy all things pumpkin. This year I was lucky enough to score a couple of real pumpkins for free and tried my hand at roasting them and turning their sweet flesh into puree for baking! I'm pretty sure the high water content of the homemade puree added to the moistness of these muffins, and I'll be hard pressed to use canned pumpkin in the future if I can avoid it. Here's to autumn lasting as long as possible and holding winter at bay!


Super-Moist Pumpkin Muffins
Adapted from Smitten Kitchen

Ingredients
1/2 cup sugar, 1/2 cup Splenda
1/2 cup vegetable oil (I bet I could have subbed in apple sauce for a bit of this)
1 cup fresh pumpkin puree
1 cup all purpose flour
1/2 cup whole wheat flour
1/2 teaspoon vanilla extract
1/2 teaspoon salt
1/2 teaspoon baking soday
forgot to use 1/2 teaspoon baking powder (whoops) but got a very nice rise anyway
1 teaspoon Pumpkin Pie Spice: 
1/2 teaspoon ground cinnamon
1/4 teaspoon ground ginger
1/8 teaspoon ground nutmeg
1/8 teaspoon ground allspice
sprinkle of ground cloves
2 Tablespoons sugar + 1 teaspoon ground cinnamon for topping
optional: top with roasted pumpkin seeds


Directions
1. Preheat oven to 350 degrees F. 
2.In a large bowl whisk together pumpkin, 1/2 cup sugar, oil, vanilla extract, Splenda, pumpkin pie spice, baking soda (and I'm guessing baking powder as well) and salt until smooth.
3. Add flours and whisk til just combined.
4. In a small bowl combine 2 Tablespoons sugar with 1 teaspoon ground cinnamon.
5. Fill your muffin tin with the batter, only about 3/4 full in each well. Top with cinnamon sugar and pumpkin seeds if using. 
6. Bake for 25-30 minutes until golden. 

Saturday, November 5, 2011

Oat and Maple Syrup Scones

Natural lighting really is as magical as they say it is.

Scones. I see them at Starbucks but never get them because I can't bring myself to pay so much for just one of something I could make several of for a fraction of the cost. Plus, who knows how long they've been sitting under that fluorescent glow?

So a couple of weeks ago, I made scones by combining two recipes (I didn't have enough of either set of ingredients) and hoped for the best. I enjoyed the results, and here they are, for your viewing, reading, and snacking pleasure.


Oat and Maple Scones
Adapted from Smitten Kitchen and The Joy of Baking


Ingredients
1 cup all purpose flour
1/2 cups whole wheat flour
1/2 cup rolled oats
1/2 cup butter (1 stick), cut into 1 inch cubes
1/4 cup skim milk
1/4 cup maple syrup
1 very heaped Tablespoon baking powder
1 heaped Tablespoon granulated sugar
1/2 teaspoon salt
1 beaten egg for eggwash


Directions
1. Preheat oven to 400 degrees F.
2. Whisk together all purpose flour, whole wheat flour, rolled oats, sugar, salt and baking powder in a large bowl. 
3. Using your fingers, combine the butter with the dry ingredients until the blend is breadcrumb consistency. 
4. In a small bowl combine milk and syrup, then add this to the dry ingredients.
5. Using a spoon or rubber spatula, combine the dough until it all comes together -- now you're ready to form the scones!
6. To form scones, roll out dough to a thickness of about 1.25 inches, and form into a circle. Next, cut into wedges (say, 8?) or whatever size you find appropriate. Just don't make them too thin or you won't get their characteristic quasi-fluffy rise. You could also use round cookie cutters if you prefer your scones biscuit-shaped. 
7. Separate the wedges a bit and place on a parchment lined pan. Brush on the egg wash for a golden finish.
8. Bake for 15 minutes, and please, as always, follow your nose! If it smells really good in the kitchen, it might just be time to take the goods out of the oven, regardless of what the directions say!


Saturday, September 3, 2011

Oatmeal Buttermilk Blueberry Pancakes


Pancakes are my favorite weekend breakfast. They take a bit of time to put together, sure, but it's so satisfying to dig into that delicious mound of carbs and sweet syrup, knowing that you don't need to rush off to school or work.  

Pancakes take me back to when I was a kid. Growing up, my mom and I would make them together on Saturday mornings whenever we felt inspired; Aunt Jemima was our favorite mix and "syrup" back then. I remember feeling so proud when I finally mastered the art of pancake flipping, knowing exactly when they were ready to turn. I loved how easily they unstuck from her cast iron skillet, and it was one of the few cooking tasks my mother would let me take charge of. These days I don't make pancakes too often, but when I do I always remember being a kid, my mom letting me serve her food for a change. 

Here's a heartier pancake recipe than the one I used to keep as an instant mix, for when you want to feel like you're doing something good for yourself even while you indulge. 


Oatmeal Buttermilk Blueberry Pancakes
Adapted from a recipe by Martha Rose Shulman on the New York Times


Ingredients
1/2 cup rolled oats
1/2 cup skim milk
1 cup whole wheat flour
1/2 cup unbleached all-purpose flour

2 teaspoons baking powder
1 teaspoon baking soda
1 tablespoon sugar
1/4 teaspoon salt
2 large eggs
1 1/2 cups buttermilk*
1 teaspoon vanilla extract
3 Tablespoons canola oil
1 cup fresh or frozen blueberries


*If you don't have buttermilk, you can use this easy substitute: Add 1 Tablespoon white vinegar or lemon juice to each cup of milk you use. Let sit for 5 minutes. Et voila -- buttermilk!


Directions
1. In a medium bowl, combine milk and rolled oats and set aside.
2. Using a sieve, sift together the flours, baking powder, baking soda, sugar and salt.
3. In a large bowl, whisk the eggs then whisk in the buttermilk, vanilla extract and oil.
4. Add the flour mix to the wet ingredients and whisk together, being careful not to overbeat (it's OK to have a few lumps).
5. Fold in the milk & oats. The original recipe suggests letting this sit for an hour or to refrigerate overnight. I just waited 15 minutes and had excellent results.
6. Since investing in a cast iron skillet I find I don't really need much oil to keep my pan nonstick, but feel free to spray your griddle with some cooking spray. Next, drop 1/4 cup of batter into your pan at a time, adding as many blueberries as you like (try not to overload it, though, otherwise they'll get heavy and hard to flip successfully. 5-6 is a safe bet.).
7. Cook until large bubble break through the top, approximately 2-3 minutes. Flip and cook for about a minute more, until golden brown.
8. Serve warm with maple syrup, butter, or, as my mom likes them best, a slice of American cheese :) 


Tips: 
A. To make sure your pancakes stay warm as you keep cooking, you can either turn the oven light on and store your cooked pancakes in the oven, or you can lightly cover your cooked stack with some foil, just to keep the heat in.
B. After you make a batch, freeze in ziplocks in packs of three. Then you can thaw them in the microwave for a pancake breakfast during the week!


Monday, July 11, 2011

"Stage Two" Granola

 
"Not to diss your other granola, but I think this is the best one you've ever made."  - 'Chefski.

Yeah...  I don't think this recipe needs any more endorsement than that.

Whenever I want to look for something to make in the kitchen, I usually just hit up my favorite cooking and baking blogs for inspiration, but this time I decided to leaf through The Joy of Cooking -- which I really could spend hours reading cover-to-cover -- to see if there was any way to improve upon the last granola recipe I'd tried. Sure, I liked it, but it wasn't quite as crunchy as I'd dreamed homemade granola could be. 
 
Blame Small World Coffee in Princeton for schooling me on the art of granola -- I had maybe two of their vanilla yogurt-banana-granola parfaits in my time there, but man! They clearly made a lasting impression. Now that I find myself in "stage two" as a cook (Mark Bittman's category, for cooks who don't just follow recipes to the T, but rather mix n match a bit and know their preferences), I feel more comfortable looking at recipe and saying "yea.... I think I'll add some pepper.." or, "you know what? this would be GREAT with cinnamon and vanilla." I trust myself more, and blogging about culinary adventures has certainly helped.

I will add that Small World's granola was more like a roughly chopped bar, while this recipe's got clusters and looser oats/seeds. Nevertheless, I nailed that crunch. The sesame seeds are key, and next time I might try to give cashews, almonds and sunflower seeds a go (the latter two were in the original Joy recipe) and see if this lives up to my memory. And, as usual, I'll consider using a bit less oil next time. At any rate, this is my new go-to granola. 

It's the kinda thing that makes a gal feel like she accomplished something, you know what I mean?

Crunchy Granola
Adapted from The Joy of Cooking

Ingredients
3 cups old-fashioned rolled oats
1 cup coarsely chopped nuts (I used pecans instead of almonds)
1 cup shredded coconut 
1/2 cup sesame seeds
1/2 cup flax seeds (this was instead of sunflower seeds) 
1/2 honey (or maple syrup
1/2 cup vegetable oil (next time I'd use 1/4 cup)
1 teaspoon ground cinnamon
1 teaspoon vanilla extract

Directions
1. Scatter oats over a large baking sheet and toast for 15 minutes in an oven preheated to 350 degrees F. Be sure to stir and toss frequently.
2. Meanwhile, in a large bowl combine nuts, coconut, seeds, and cinnamon. Once your oats have toasted, add those to the bowl.
3. In a small saucepan, heat oil and honey/syrup for 5 minutes over low heat.
4. Once your sweetener is heated, stir it into your dry ingredients.
5. Spread your granola mix onto the baking sheet (if you've got too much to make a thin layer, use two baking sheets).
6. Use your judgement and bake for 30-45 minutes (i.e. don't burn it, but get it nice and toasty), stirring regularly to evenly bake.
7. Once you've taken the pan out of the oven, throw in some chopped dried fruit (I had a mix on hand that contained apricots, apples and pears) and toss to combine thoroughly. 
8. Allow to cool completely -- you know, go read a book, relax for a while, and come back to find your granola crunchy! Will keep for a good while (a month) in an airtight container in the fridge. 


Sunday, June 19, 2011

Brown Butter Banana-Strawberry Bread

Brown butter. If you don't know, you need to find out.

Facts:

A) Yesterday I (mostly) ran 4.4 miles, outside, by the Hudson. After a few weeks of running across the George Washington Bridge, I can tell you the road/blacktop on the Greenway is much easier on my joints (did I just say that?) than the metal bridge. I like it.

B) I've realized that you should never decide that you don't like a fruit or vegetable until you've had an organic specimen, or at the very least one that's at the peak of ripeness.  This fact has helped me discover a true love of tomatoes and several other fruits. Today's strawberries may not have been organic, but all I know is that I really thought I hated those berries until I got these yesterday.

C) There are 16 Tablespoons in 1 cup, 8 Ts in 1/2 cup, and 4 Ts in 1/4 cup. Good to know. Especially when you've misplaced your 1/4 cup.

D) Brown butter smells soooooooooooo good! I see more (but not too much!) of it in my future.

About this recipe:

I love the tanginess the strawberries add to this version of banana bread, and I'm really digging the almost cake-like moistness. Knowing that I'd gladly consume all of this in one day, I did the right thing and sliced up the loaf, wrapped it in plastic and aluminum foil. This tastiness is freezer bound to be rediscovered as a surprise snack in a few weeks when I feel I've earned it.

I think next time I might cut down on the fat and sub in some apple sauce to compensate for the lost moisture I'd expect as a result, though even then, I think this could have been a bit sturdier and still been great. 


Brown Butter Banana Strawberry Bread
Adapted from Joy the Baker 

Ingredients
1.5 sticks/6oz/12 Tablespoons of butter, which will be melted and browned to about 1/2 cup
1 1/4 cup mashed banana (I used 3 medium bananas)
1/2 cup diced strawberries plus 1 very thinly sliced strawberry for topping (I think I went with more like a cup of strawberries)
 
Dry Ingredients:
1 cup all purpose flour
1 cup whole wheat flour
3/4 cup brown sugar
3/4 teaspoon ground cinnamon
The original recipe calls for 1 teaspoon baking soda and 1/2 teaspoon salt, but About.com told me I could sub in 2 teaspoons baking powder and omit the salt, so I did that (I had no baking soday)
Wet Ingredients:
2 large eggs
1 teaspoon vanilla extract
1/4 cup plain nonfat yogurt or buttermilk (I used yogurt)

Directions
1. Preheat your oven to 350 degrees F, and grease and flour a 9X5-inch loaf pan and set aside for later. (Since I'm using a glass pan, I reduced the temp to 325F)
2. In a saucepan, melt butter over medium heat. The butter will foam and sputter at increasing rates as it melts, though this will slowly subside and evenually your butter will be browning. If you see some brown specks, don't worry! This is exactly what you want. Once you've got a lot of those lil specks, and you begin to smell a delectably  nutty scent, remove from heat and place in a bowl so that it can cool (I put mine in the fridge to help the process -- don't worry, it's not gonna solidify like melted butter would).
3. Since I knew I'd be making this since yesterday, I premixed the dry ingredients in a large bowl. If you lacked this foresight, do so now. 
4. In a medium bowl, whisk together wet ingredients. 
5. Whisk in mashed bananas as well.
6. Once the butter has cooled, mix those into your wet ingredients too.
7. Add all your wet ingredients to your dry ingredients, folding together using a spatula until just combined (i.e. don't overstir). 
8. Fold in the diced strawberries.
9. Pour your batter into the prepared pan, and top with the thinly sliced strawberry. 
10. Bake for about 50 minutes to an hour, until a toothpick/ knife comes out clean. (Now, you gotta be careful whenever you bake in an oven you're not used to -- even at a lower temperature, I only baked mine for about 30 minutes before it was time to let it out, so trust your nose! If it smells amazing, you're probably almost done baking
11. Remove from oven and allow to cool for 15 minutes before turning out.

Thursday, May 19, 2011

Graduation-Bon Voyage Baked Donuts

Donuts. Picture taken with my netbook's webcam. 
Grainy, sure, but I like it. Captures the feeling of transition.

Because I'm moving back to NYC. Because I haven't baked in a long time. Because it's time to have a final, farewell breakfast with my distinguished colleague and graduate school bud, Nick, and his dad on the morning of graduation (part 1). I'd bookmarked this baked donut recipe a while ago, so I jumped at the chance to get in that old Maryland kitchen one last time before I set off on my trip back to the big city. 
I decided not to walk for graduation because I'd already gone through that ceremony thrice before (pre-K, high school, and college). Plus, my fam and 'Chefski couldn't make it down, so there was even less incentive to buy a cap n gown. Still, I've really enjoyed the hefty handful of goodbye lunches, end-of-year gatherings and get-togethers that I've been able to attend -- it helps give a nice finality to it all, with an added "to be continued" vibe as a bonus. 


These donuts were airy yet substantial, light, buttery, and easy to pull-apart so as to enjoy all that fluffy goodness. I'm convinced they'd be great with a variety of toppings, icings, and probably plain as well. (An update late in the day solidified their awesomeness: I made 'em at 10am, and by 7 o'clock, they're gone.)

How do they compare to the fried kind? I have to admit, I've never been too much of a donut fan, but these are so tasty I don't feel at all tempted to try any fried-donut recipes at home; I'll leave all that hot oil to the pros. 

Congratulations to all my buddies -- we made it! -- and here's to to next adventure!

I'll catch you on the flip side. 


Baked Donuts Topped with Cinnamon Sugar
Yield: ~ 12 huge donuts
Adapted from Brown Eyed Baker 

Ingredients
1 egg
1/4 cup granulated sugar
1 cup of heated milk
1 Tablespoon active dry yeast
1 teaspoon salt
2 teaspoons vanilla extract
2 1/2 cups to 3 1/2 cups unbleached flour, divided, plus more for kneading
1 stick of unsalted butter, cut into 1 inch cubes

For Cinnamon-Sugar topping:
1 stick of butter, melted
1 cup granulated sugar + 2 Tablespoons cinnamon 

Directions
1. In a large bowl, beat together egg and sugar until well incorporated.
2. Add hot milk, yeast, salt, and vanilla.
3. Once well combined, add 2 cups of flour and stir together until it comes together (I used a spatula to do this). 
4. Start adding the butter a few pieces at a time and mix with the hand mixer until worked it. Now, you gotta work with me here, because I've adapted this recipe from instructions that use a stand mixer, which I don't have, nor will I have until I win one through the many food blog contests I enter to win one, or someone buys it for me off of a wedding registry.... one day...
5. Once you've added in all of the butter, add more flour until the dough starts to come together and is no longer sticking to the bowl. Thanks to Maryland humidity, I ended up needing the full 3.5 cups, but use your judgment.
6. Turn the dough out onto a lightly-floured surface and knead until smooth. 
7. Place in a lightly greased bowl and cover with a damp cloth. Allow to rise for one hour, until doubled. 
8. Punch down and roll out to approximately 1/2 inch thick. Since today's the day I move, and I don't have biscuit cutters out, I used a drinking glass that had a large rim, and a bottle cap to cut out the doughnut hole. Take this time to preheat the oven to 400 degrees F. 
9. Place the doughnuts about an inch apart on a parchment-lined baking sheet.  Cover with plastic wrap and allow to nearly double in size atop the preheating oven, approximately 25 minutes.
10. Bake until golden brown, approximately 5-8 minutes (if, you're oven is silly, keep adding 5 minutes and keep your eye on them til they're golden). 
11. Dip the warm donuts in the melted butter and sprinkle with cinnamon-sugar mix. 
12. Enjoy at once, and celebrate earning your Master's in English, being homeward bound, or whatever new adventures are in store for you now that school's out!  

I don't know why you say "goodbye." 
I say "hello."

Tuesday, May 11, 2010

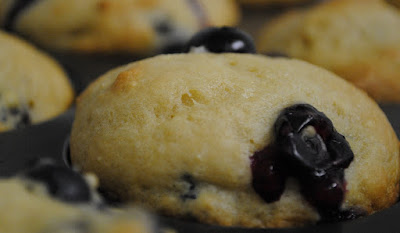
99 ¢ Blueberries @The Social Safeway = The Best Darn Blueberry Muffins to Date

This one's a 'Chefski original

In keeping with my interest in movies, I recently finished writing a paper on Kathryn Bigelow's The Hurt Locker, where I focused on her film's emphasis on the dangers of "physical and psychic" blindness. In one of my favorite scenes, the protagonist returns home only to be faced with his inability to readjust to civilian life. His discomfort is revealed masterfully when his wife casually asks him to "grab some cereal," and all he can do is uncomfortably scan the aisle, which is filled to capacity, before his irritation draws him to whatever box is within reach. Consumerism at its worst: too much choice where it doesn't matter. 

So there, I proved to you that I am a critical thinker and that I despise excess, which will hopefully make what I'm about to say next go down a little easier.

You have got to see the new Safeway that opened up last week. They've got organic and conventional produce, a fancy climate-controlled wine cellar, a Starbucks, a pizza station, gelato and ice cream station, and they make sandwiches just like at the Wawa. Not only is it as beautiful as the nicest Whole Foods you've ever been to (and has the normal brands WF thinks itself too good to carry); it is the first supermarket in the entire District built to LEED standards (i.e. entirely sustainable). I dig that. I really do.

Of course, I speak from the perspective of someone who, back in NYC, lived in a 'hood where edible produce within a walkable distance was scarce, and frozen blueberries were near-impossible to find. Given that, just imagine my delight on opening night when I discovered that fresh blueberries were going for 99 ¢! Yes, it's a big deal! They're usually closer to four bucks a pop (and by "pop" I mean pack). If that had or has been in your past, I think you'll dig this place too.

Or if you like shiny, new things. Or if you can admire and respect a business that clearly still believes that "the customer is always right." And again, coming from a place where few people seemed particularly happy to have jobs -- even as grocery baggers -- it is refreshing to enter a store where everyone knows the rules of the game: you make your customers happy, they will buy more.

As my high school Economics teacher used to say: Build it and they will come*. They built it. I went. I got some blueberries. And I think I finally found the muffin recipe I have been searching for.  

* I wish I could remember who he was quoting.


By George! I think we've got it! Blueberry Muffins
Adapted from The Joy of Baking 

Ingredients
2 cups all purpose flour
1/2 cup sugar
1 teaspoon baking soda
1/4 teaspoon salt
1 cup plain yogurt
1 large egg, lightly beaten
4 oz apple sauce (an individual container... I used this instead of the 1/4 cup canola oil the recipe calls for)
1/2 teaspoon vanilla extract
1 1/4 cup blueberries (fresh or frozen -- don't thaw)

 The blood blueberry is the life!

Directions
1. Preheat oven to 350 degrees F. Place rack in center of oven, and lightly grease your muffin tin.
2. In a medium-sized bowl whisk together the egg, yogurt, apple sauce (or oil) and vanilla extract. 
3. In a large bowl whisk together flour, sugar, baking soda, and salt. 
4. Scoop 1 Tablespoon of your dry ingredients and toss it around with your blueberries.
5. Using a rubber spatula, fold your wet ingredients into your dry ingredients and stir until just combined. 
6. Gently fold in the blueberries -- don't overmix or the berries will sink to the bottom (and your batter won't rise... you want to keep your baking soda's rising power for the oven). 
7. Fill your muffin pan with the batter, lick the leftover batter from the bowl, and bake your muffins for 15-20 minutes or until a toothpick/knife/ other "done-ness tester" inserted into the center of a muffin comes out clean. 
8. Transfer the pan to a wire rack or plate and let cool for about 5 minutes before you remove the muffins from the pan.
9. Got milk? Dive in!

Monday, April 12, 2010

Muffin Monday


Case of the Mondays? 

Yup. 

Whatcha gonna do about it?

Make some muffins!

My favorite muffin is blueberry, and I've been looking for a recipe to call my go-to for some time now. Now, if you're not a fan of whole wheat goodness, these may not be the muffins for you, and I'll be the first to admit these aren't those beautiful, cake-like numbers you'll find at Starbucks, but I loved 'em. 

And while I won't call off the quest just yet, these definitely made Monday much better.

Oatmeal Blue-n-Blackberry Applesauce Muffins
Adapted from Annie's Eats

Ingredients
1 1/4 cup whole wheat flour
1 1/4 cup oats
1 teaspoon baking powder
1/2 teaspoon baking soda
1/4 teaspoon salt
1/2 teaspoon cinnamon
1 individually-sized container unsweetened applesauce (original recipe calls for a cup)
1/2 cup non-fat plain yogurt (original recipe calls for 1/2 cup low-fat buttermilk)
1/2 cup brown sugar
2 Tablespoons canola oil
1 large egg, beaten
3/4 cup blueberries (I subbed in some blackberries since I ran out of blue' early)

Directions
1. Preheat over to 375 degrees F.
2. In a large mixing bowl, combine whole wheat flour, oats, baking powder, baking soda, salt, and cinnamon. 
3. In a smaller bowl, combine applesauce, yogurt, egg, oil, and brown sugar. 
4. Make a well in the dry ingredients, add the wet ingredients, and stir together until they are just combined (don't over-mix or your muffins won't rise well)
5. Add the fruit and gently fold in with a spatula.
6. Add to your muffin pan and bake for 16-18 minutes until a knife inserted comes out clean.
7. Monday Improved!

Friday, March 5, 2010

Granola- la-la


Alarmed at the lack of available bready carbs up in here a couple of days ago (or maybe just because I wanted to procrastinate a bit from school work), I decided it was high-time I whipped up a fresh batch of granola. Not only is a great snack when there's no bread around (read: when you have, for whatever reason, chosen to freeze all the glorious bread you've made); it doubles as cereal in the morning :)


Adapted from the New York Times
Ingredients:
6 cups rolled oats
1/2 cup flax seeds
1 cup slivered almonds
3 teaspoons ground cinnamon
a dash of salt
1/3 cup canola oil
1/2 cup honey
1 teaspoon vanilla 

Directions:
1. Preheat oven to 325 F.
2. In a large bowl, combine oats, flax, almonds, cinnamon, and salt.
3. In a small microwave safe bowl, combine oil, honey, and vanilla. Heat on high for about 30 seconds (or less) -- don't let it get to a simmer, you just want it to get warm.
4. Pour liquid over oat mix and stir well to coat evenly.
5. Distribute granola mix over two aluminum foil covered baking pans. Cook for about 45 minutes to an hour, checking every 15 minutes to toss and to switch top pan to lower rack, and lower pan to upper rack.
6. After you're done baking and everything is golden brown, you can add craisins, raisins or other dried fruit. Once cooled, you can store them in well-sealed containers, jars, or plastic bags.
7. Enjoy alone or with yogurt or milk. 


Thursday, March 4, 2010

The Result of a Long Walk


One Saturday night, 'Chefski and I took a much-needed walk downtown to clear our minds. What follows is the true story of what happened next.

'Chefski, with nostalgia: "...you know, I used to really like bagels..."

Caro, with equal dreaminess: "...yeah, me too! I used to love them..."

'Chefski, ominously: "...then I realized what bagels really are..." 

Caro: "I know....they're like FOUR slices of bread!"

::Mutual shudder, followed by silence::

'Chefski: "Do you think we can make our own?"

:P

Our Very Own Bagels!
Adapted from Smitten Kitchen, originally from The Bread Baker’s Apprentice

Ingredients
Sponge:
1 teaspoon active dry yeast 
4 cups bread flour
2 1/2 cups water

Dough:
1/2 teaspoon active dry yeast
3 3/4 cups bread flour
2 3/4 teaspoons salt
2 teaspoons malt powder or 1 Tablespoon malt syrup, honey, or brown sugar

Finishing:
1 Tablespoon baking soda
Cornmeal for dusting
Sesame seeds, poppy seeds, and whatever else you want on your bagels (like pepper flakes and dill!)


Day One: 
1. Making the Sponge: Activate the yeast by combining 1/4 cup of warm water. 
2. Once it is dissolved, combine with 4 cups flour in a large bowl and add remaining 2 1/4 cups water. Whisk mixture until smooth.
3. Cover bowl with plastic wrap and let rise at room temperature for 2 hours or until foamy and bubbly.
4. Making the Dough: Add 1/2 teaspoon yeast to a tablespoon of water. Add that to sponge and mix. (If you're making cinnamon raisin, increase the yeast here to 1 teaspoon)
5. Add 3 cups of flour, the salt, and the malt (if you have it) or sugar/honey. Stir until the dough forms a ball, and slowly incorporate the last 3/4 cups of flour if necessary to make a stiffer dough. (For cinnamon raisin, also add 1 Tablespoon ground cinnamon and 5 Tablespoons granulated sugar)
6. Turn out dough onto a flat surface and knead for 10 minutes. All ingredients should be held together -- no dry flour adhering to dough. In the words of Smitten Kitchen, the dough should be "satiny and pliable." (For cinnamon raisin, rinse two cups of raisins with warm water to get rid of any excess sugar, acid, and wild yeast. Add them to the mix during your last two minutes of kneading.)
7. Divide the dough into the size of bagels you want to make. I would say err on the side of smaller than you want, as they will rise some. Form them into rolls.
8. Cover the rolls with a damp paper towel (hey, I have no towels for cooking!) and allow to rest for 20 minutes.
9. Cover two sheet pans with aluminum foil (cuz we don't ever have parchment paper) and spray lightly with oil.
10. Shape your bagels by poking a hole in the center of each roll and gently widening it to 2.5 inches for large bagels, or 1.25 inches for small ones. 
11. Place each piece about 2 inches apart on the pans and spray oh-so-lightly with oil.  Cover lightly with plastic wrap, and let sit for 20 minutes.
12. Time to "retard" the bagels. Fill a bowl with cool water, and if your test bagel floats within 10 seconds of being dropped in the water, they are ready to be retarded. If it floats, return it to pan, pat it dry, and re-cover all the bagels with the plastic and place in the fridge overnight (or up to two days). Now, my bagels didn't float. So what I did was wait 20 minutes, put half in the fridge to bake the next day, and actually went ahead and put half in a pre-warmed but turned-off oven for 30 minutes. They rose a bit, so I put some back in the fridge for the next day, then ::GASP:: baked a few using "the next day" instructions the very same day! And they tasted great, and are pictured in this post. So lesson: keep experimenting!

The Next Day:
1. Make sure two racks in your oven are in the middle, and preheat oven to 500 degrees F.
2. Bring a large, wide pot of water to boil. Add the baking soda, and be sure to have a slotted spoon nearby.
3. Get the bagels from the fridge and drop in the water, without overcrowding the pot. Flip after two minutes (I like extra-chewy bagels, but if you want slightly less chewy, you can boil 1 minute per side). 
4. Meanwhile, sprinkle your lined pans with cornmeal. Brush tops of bagels with egg wash to to keep toppings on after baking. Place them on the pans. (For cinnamon raisin, you can brush the tops with melted butter and dip in cinnamon sugar for a sweet crust. Optional).
5. Once you've got all the bagels on your pan, place the pans in the middle two racks in the oven. Bake for 5 minutes, then rotate pans 180 degrees. Now lower oven temperature to 450 degree F and keep baking for 5 more minutes, until bagels are light golden brown, or longer if you like them darker (up to an additional 5 minutes).
6. Cool the bagels on a rack for 15 minutes or so before serving.


Wednesday, March 3, 2010

Challah Back, Youngin': Baked Challah French Toast


Sometimes not having milk is a problem. I mean, not a serious problem...You can make Challah bread, after all! But what about when Challah wants a new look? What about when she wants to throw on something extra nice, something with a bit of a French flair? You know, when she wants to become French Toast? 

Then, my friends, you absolutely need milk. And so, as the first bits of snow began to melt a good four days after Snowmaggedon, 'Chefski and I braved the elements to visit our favorite mega-Giant in Friendship Heights to get some much-needed milk and other staples. 

Upon our return, famished but not too frozen, we eagerly prepared the following recipe. In our eagerness to eat, however, we decided to forgo one overnight step (at the time, we wanted to eat now!), which yielded pleasantly surprising results. So the dual morals of this story are: sometimes milk is important, and improvising, adjusting, and experimenting with recipes is a good thing! Don't be afraid to try doing it your way* :)

*unless you're at a karaoke bar.

Baked Challah French Toast with Eggy-Flan-like-Goodness
Adapted from Smitten Kitchen's Boozy Baked French Toast (can you tell I love that blog?)

Ingredients
As many slices of Challah bread as you like (to feed two, I used 4 slices)
1 cup milk (skim for us, but whatever you like... and up to 3 cups if you're using a whole loaf)
1 egg (up to 3, again, for a whole loaf)
1 Tablespoon sugar (up to 3 Tablespoons)
1/2 teaspoon salt
[We didn't do this (this time), but you can also add 1-3 Tablespoons of Bailey's, Cointreau, Frangelico, Chambord, Creme de Cassis or Grand Marnier for an added kick of flavor... or 1-2 teaspoons of vanilla or almond extract. Nuts and raisins/dried fruit also possible.]

Directions
1. Using a stick of butter, lightly grease a pan that will keep your slices of bread snugly fit together (I used a 6-inch circular cake pan)
2. Set down bread in 1-2 layers, snugly-packed.
3. Whisk together milk, egg(s), sugar, salt, and liqueur/ extract. Pour over the bread, and sprinkle with a little (or a lot) of cinnamon and sugar.
4. Tightly cover in plastic wrap and though you're supposed to let it soak overnight, we were too
eager to make it, we let it soak in the fridge for maybe 15 minutes. (I mean, we'd JUST gotten our hands on some milk! It was "no problem!" for the challah earlier that week, but definitely necessary for this recipe... so we just said "what the heck!" and made it our way, which made for a pleasant surprise at the end)
5. We baked it at 425 degrees F for 30 minutes, covered in aluminum foil (which you don't have to do... we just felt like it... to avoid any possible egg mess).
6. When we pulled it out of the oven we were surprised to find our eggy-milk mix had come together to a custardy, flan-like consistency! It was sweet and velvety the way flan should be, but less sweet. Cut up pieces to serve, crumble flan-like goodness atop your plate, and lightly dust with confectioner's sugar. Add a little maple syrup and you've got yourself brunch!

Someone's "after" and someone's "before." I'm not gonna name names, but let's just say the "someone" taking this photo hasn't finished her breakfast yet ;)

Tuesday, February 23, 2010

The Biscuits of My Dreams: Cream Biscuits

These biscuits are an exercise in discipline for me.
So creamy, so fluffy, so mmm.

You see that lil guy up there? That, my friends, is a biscuit. And not just any biscuit -- I call him the Biscuit of my DREAMS cream biscuit. I call him that because as soon as I take a bite of this fluffy, bready, creamy piece of mmm, all I can do is close my eyes, shake my head, and think "Now this is the life!"

"But he looks so lonely!" you wail. That may be true, but allow me to let you in on a little secret: I really like these biscuits. No. I'm serious. I like these biscuits too much. (They're the biscuits of my dreams, for cryin' out loud!) So the only way I can avoid eating 10 in one sitting is to bake just a few at a time and flash freeze* the rest. No baskets brimming with biscuits around here! Nuh uh. With a little self-control and the knowledge that I can make one of these any time I want, I think I may just make it one whole night without indulging. 

I can't promise the same for you ;)

Biscuits of My Dreams, a.k.a. Cream Biscuits


Yield: ~10 biscuits

3 tablespoons melted butter
2 cups all-purpose flour
1 tablespoon baking powder
1/2 teaspoon salt
1 tablespoon sugar
1 1/4 cups heavy cream

1. Preheat oven to 425°F. (It took a while for my oven to get there, hence why, for the first time, I'm actually listing this as step 1).
2. In a large bowl mix together flour, baking powder, salt and sugar. 
3. Fold in cream. Smitten Kitchen's recipe called for an extra 1/4 cup of heavy cream which I didn't need, but the goal here is to make your dough soft, not too sticky, and easily to handle.
4. Turn out dough onto a floured surface, roll it into a ball using your hands, then press it down to a thickness of approx. 3/4 inch. 
5. Using a cookie cutter, biscuit cutter, or (as in my case) a small glass, cut into rounds of around 2.5 inches in diameter. Continue until you've used all the dough/scraps.
6. Melt butter in the microwave. Dip the tops of the biscuits in this butter. At this point, you may decide you don't want to make all these lil dreams today, so you can go ahead and flash freeze the ones you want to save (see below for directions)
7. Place biscuits on a parchment paper- or aluminum foil-covered baking pan, and bake until golden, about 12-15 minutes.
8. Enjoy alone, or with butter (typical), hummus (delicious), baba ganoush (even better), or honey (heavenly).

Honey-covered biscuit. 
::Drool::

*A note on flash freezing: If you decide that you're not going to make all your biscuits right away, you can place them on a cookie sheet, then place the whole sheet in the freezer. Once the biscuits are solid (a few hours or overnight), place them in a ziplock bag. Now, when you want fresh baked biscuits, pop them in the oven straight from the freezer and add 3-ish minutes to your baking time. They're just as good as on the first day.