Saturday, May 28, 2011

Tzatziki (Greek Yogurt Sauce)


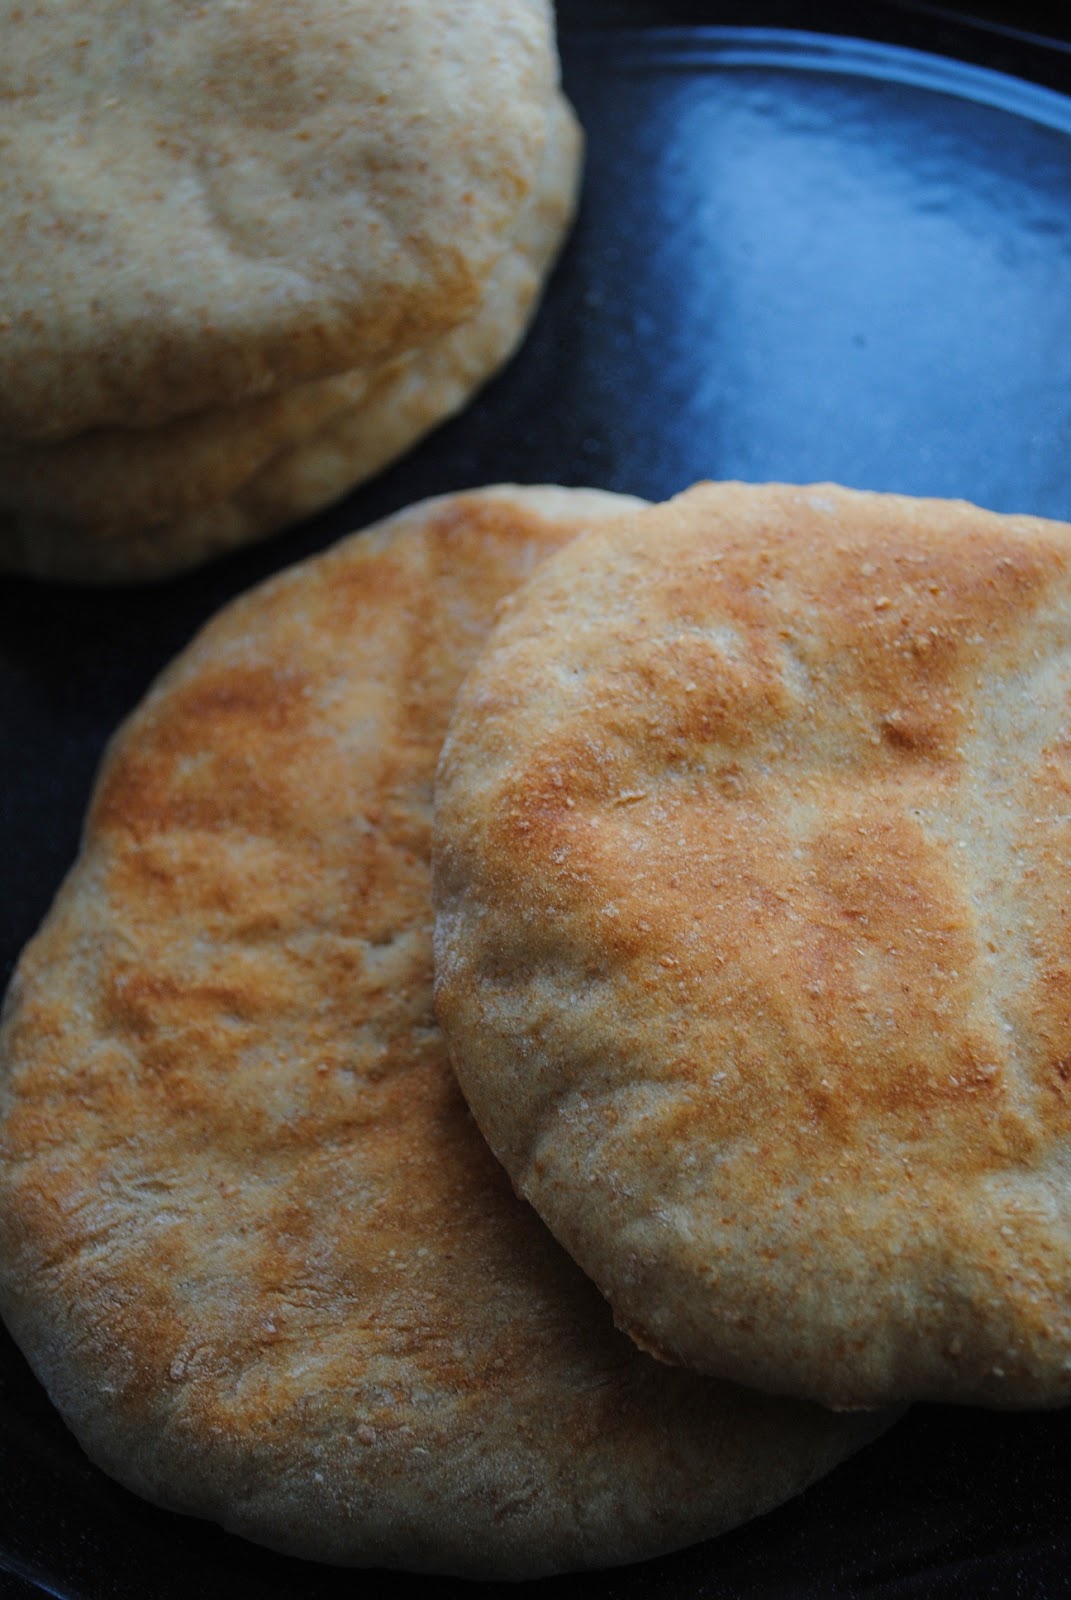
I honestly don't understand how I went this long without making tzatziki. I'd made some last year and it was great, but for whatever reason I forgot how magical the experience was and then kept putting it off and here we are. Not only is this super easy to make and incredibly flavorful after the 30 minutes of refrigeration the recipe calls for; it's even better on day two! Alas, the tzatziki didn't make it to day three (it was too good! irresistible, really). I've been slathering it on the pita I made the other day, and all I know is that this is another one of those "shake my head because this is too darn good" recipes. 

Tzatziki
Adapted from Elly Says Opa!

Ingredients
1 32-oz container of plain fat-free yogurt (or Greek yogurt; if using, skip straining step)
2 cucumbers, peeled and seeded
5 cloves of garlic, smashed then roughly minced (dial down the garlic if you don't love garlic the way I do)
1-2 teaspoons of white vinegar
salt, to taste
a sprinkle of black pepper
a quick splash of fresh lemon juice
a quick drizzle of extra virgin olive oil
dill, to taste

Directions
1. Using cheese cloth, strain yogurt overnight over a large bowl. You'll be stunned at how much liquid comes out, and the resulting yogurt will be thick like Greek-style yogurt.
2. Take your peeled and seeded cucumbers and shred them using a vegetable peeler or cheese grater. Since I had neither on hand (this is what happens when you move!), I kinda chopped and finely diced the cukes into smallish pieces. I've made this before using one of the aforementioned tools (and recommend it for a smoother consistency), but since I don't mind finding big pieces of veggies, I went ahead and made this "rustic" style.
3. Using a clean towel, paper towel, or more cheese cloth, squeeze the cucumbers as much as you can to get the liquid out. Once you think you've got out all the water, pause, regroup, and then do it again! Then one more time. The less liquid you've go got in the final product, the creamier-thicker-tastier (in my opinion) it will be.
4. In a large bowl, combine yogurt, cucumbers, garlic, vinegar and lemon juice. Add a bit of salt to taste, then refrigerate for at least 30 minutes so that the flavors can get to know each other.
5. When serving, sprinkle with a bit of dill and drizzle with a bit of olive oil.
6. Enjoy as a dip for pita (chips), on a gyro, or by the spoonful.

Friday, May 27, 2011

Whole Wheat Pita Bread


Sometimes when it's muggy out and I'm on vacation and I feel like "I'm worth it," I get in the mood to bake something. It's not that I'm bored so much as I finally feel that I have time to have some fun and relax, and for me, making something that requires specific, yet somehow flexible steps results in my feeling particularly accomplished. While studying feels like it will never end (I always felt I could have studied for one more hour), and paper-writing inevitably means producing something that could benefit from even further revision, cooking and baking have more definite beginnings, middles, and ends. You measure out the ingredients, if you're using yeast you'll have some down time during which the dough rises, and at the end you'll have something warm and handmade. I like that.

Of the many recipes I've saved for "later," homemade whole wheat pitas is one I've been especially excited for. A great piece of pita or other flatbread dipped in hummus, baba, or cool tzatziki really makes my heart sing. And let me tell you, these pitas will really put the store-bought variety to shame. Next time, I'll try replacing 1/4 cup of bread flour with whole wheat, just to see how high I can take the heartiness. Together with a simple salad of mixed greens, roasted red peppers and some tuna on the side, you have what I consider a perfect dinner for a hot spring-turning-into-summer night.

Pitas and tzatziki

Whole Wheat Pita Bread
Adapted from Annie's Eats

Ingredients
1 Tablespoon Active Dry Yeast
1 Tablespoon honey
1 1/4 cups warm water, divided
1 1/2 cups bread flour, divided
1 1/2 cups whole wheat flour, divided
1/4 cup extra virgin olive oil
1 teaspoon salt
cornmeal for sprinkling

Directions
1. In a large bowl mix together yeast, honey, and 1/2 cup of water, stirring with a fork to help dissolve the yeast.
2. Add 1/4 cup of bread flour and 1/4 cup of whole wheat flour and whisk together until smooth.
3. Cover the bowl with plastic wrap and place in a warm spot for about 45 minutes until doubled and bubbly. 
4. Add remaining 3/4 cup of warm water and 1 1/4 cups each of bread and whole wheat flour, as well as the olive oil and salt. Knead for about 10 minutes until the dough is smooth and elastic. 
5. Now, place the ball of dough in a lightly oiled bowl bowl and allow to rise for about an hour, until doubled.
6. Move oven rack to the middle position and place a baking sheet inside. Preheat oven to 500 degrees F.
7. After your dough has risen, deflate your dough and place on a lightly floured surface. 
8. Divide your dough into 8 equal portions and form each into a ball. Then flatten each into a circle about 6.5-7 inches in diameter.
9. Transfer your pita rounds onto a work surface covered with cornmeal. Cover with a clean kitchen towel or a bit of loose plastic wrap for about 30 minutes, until they begin to puff up a bit.
10. Place 4 pitas in the oven on your preheated baking sheet, cornmeal side down. Bake for two minutes.
11. Using tongs, flip the pitas and bake for one more minute. Repeat with remaining rounds.
10. Allow to cool completely on wire rack and enjoy your homemade pitas in hummus or tzatziki. The original recipe states these will keep for 3 days in an airtight container.

Monday, May 23, 2011

Old Town Alexandria and Moroccan Chicken Bastilla

This dish is a real show-stopper.
This recipe's been hiding in the draft stage for a long time. Why? Because it is a time consuming recipe, so naturally, it took a long time to transcribe and put it into my own words. But finally, I did it! And I promise you, if you want to a) really impress some folks at a potluck and/or b) try something new, tasty, savory AND sweet, then it will totally be worth the time and effort. Therefore, I (finally) present to you, Moroccan Chicken Bastilla.

 The torpedo inside the converted Torpedo Factory, an active artists' studio in Alexandria  

Last summer, 'Chefski and I went to Alexandria, VA for a day just to get away from the capital and stroll around Old Town. We sat by the waterfront to people-watch, visited the Torpedo Factory, and ended our stay with a delicious Moroccan dinner at a restaurant that brings to mind phrases like "Of all the gin joints in all the towns in all the world..." and "Here's lookin' at you, kid." Gold-tinged and tasseled  pillows, warm-hued walls, and a belly-dancer set the tone of travel; you really felt like you might have just left Virginia and were somewhere halfway around the world. 

Waning clay moon  
 
We ordered a three-course meal, and you can imagine our surprise when the first plate to come out was a powdered sugar and cinnamon covered confection. Is this dessert? After one bite we were surprised yet again -- there's meat inside! And almonds! And it was so delicious! All I remember aside from the bastilla was an amazing traditional soup, which I will soon be trying to replicate, but the main dish? What main dish? The Bastilla stole the show, and we knew we'd want to make it ourselves. 

And we did -- for an end-of-summer going-away potluck for 'Chefski and another dear lab friend, both of whom were off to start mudphud training in the fall. So you see, friends, this was kinda the right time to bring this recipe back, since it's graduation/ bon voyage season. I guess my timing wasn't to terrible after all. 

Moroccan Chicken Bastilla
Adapted from this fantastic recipe 'Chefski found online. Check out the link; the chef, Alia, made a great step-by-step video that was essential in helping us recreate the dish.    
Ingredients
For the Chicken Filling
1 whole chicken (~2lbs) (I'm pretty sure we got an approximately equivalent amount of thighs and breast... most likely because they were on sale)
2 large onions, finely chopped
1 cup of parsley, finely chopped
2 Tablespoons vegetable/corn oil
1 teaspoon ground ginger
1 teaspoon ground cinnamon
1/4 teaspoon ground turmeric
a large pinch of saffron (if you have it; I didn't)
1 teaspoon salt
1/4 teaspoon ground black pepper
2 cups water

For the Egg Filling
6 whole eggs

For the Almond Filling
10 oz package of blanches almonds
4 oz powdered sugar
2 Tablespoons orange blossom water
1/4 teaspoon ground cinnamon

For Assembling
Phyllo dough (be sure to cover the layers with a damp towel as you work -- it gets dry and becomes very fragile when exposed to air)
melted butter (the recipe says 1 stick, but I'm pretty sure I made do with 1/2 stick)
1 egg yolk

Directions
First make the chicken filling: 
1. Heat oil in a large pan on high heat. Add onions, parsley and spices and stir together.
2. Add your chicken and toss around a bit to cover in onion-spice mix. Cover the pan and cook for 10 minutes.
3. After 10 minutes, check on your chicken and add just a bit of water. The goal is to get a thick sauce, so only add enough to prevent burning. Cover and allow to cook for 3o minutes.
4. Once cooked through, remove the chicken from the pan and set aside to cool. Keep the remaining sauce in the pan; you'll be using it for the egg filling.
5. Once cooled you can separate the meat from the bones and shred into smaller pieces.
6. At this point, I'll just add that this chicken is so delicious that I will definitely be making this spice mix again and stopping here. But if you're set on making the bastilla, carry on.

To make the egg filling:
1. Add the eggs to the spice sauce in the pan.
2. Using medium-low heat, stir the eggs into the sauce and allow to cook for about 10-15 minutes. Stir occasionally. The sauce will eventually evaporate and the eggs will become a bit dry -- this is what you're going for.
3. Once dry, turn off the heat. Reserve for later.

To make the almond filling:
1. Toast/Fry your almonds in a bit  of oil until golden brown.
2. After removing any excess oil from the almonds, add the nuts to a food processor or blender along with the powdered sugar, cinnamon, and orange blossom water until crushed. A couple of quick notes: If using a blender, you may need to do this step in a few batches. Also, go easy on the orange blossom water -- it's pretty potent, so don't go overboard!

To assemble! 
1. Brush your baking pan with the melted butter.
2. Take a sheet of phyllo dough and fold it in half. Place this "double sheet" in the center of the pan. Now, place a second double sheet with 1/3 hanging out of the pan to the left of the center, and one similarly folded sheet with 1/3 hanging out to the right. (The video is especially helpful here). Brush with butter.
3. Now, add 4 more double sheets, each hanging off the plate even more (perhaps half is outside of the pan), one at each of the four cardinal directions. Brush with butter.
4. Now you're ready to start adding the fillings. Spread the egg mixture onto your phyllo-lined baking dish. Cover with a layer of "doubled" phyllo (you might use two here, depending on the diameter of your dish). Brush with butter.
5. Now add the chicken filling. Cover with a layer of "doubled" phyllo as above. Brush with butter.
6. Add almond filling. Now fold all of those pieces of over-hanging phyllo back into the center. Brush with the egg yolk.
7. Add a couple more layers of phyllo to the top, tucking the pieces into the sides of the pan, to create a smoother finish, and to reinforce the bastilla. Brush with butter every couple of layers (you'll use 3-4). Brush the final layer with butter, then egg yolk.
8. Preheat oven to 350 degrees F and bake for 20-30 minutes, until golden brown.
10. Here's the kicker: Cover with powdered sugar and cinnamon before serving. Incredible.
 

Thursday, May 19, 2011

Graduation-Bon Voyage Baked Donuts

Donuts. Picture taken with my netbook's webcam. 
Grainy, sure, but I like it. Captures the feeling of transition.

Because I'm moving back to NYC. Because I haven't baked in a long time. Because it's time to have a final, farewell breakfast with my distinguished colleague and graduate school bud, Nick, and his dad on the morning of graduation (part 1). I'd bookmarked this baked donut recipe a while ago, so I jumped at the chance to get in that old Maryland kitchen one last time before I set off on my trip back to the big city. 
I decided not to walk for graduation because I'd already gone through that ceremony thrice before (pre-K, high school, and college). Plus, my fam and 'Chefski couldn't make it down, so there was even less incentive to buy a cap n gown. Still, I've really enjoyed the hefty handful of goodbye lunches, end-of-year gatherings and get-togethers that I've been able to attend -- it helps give a nice finality to it all, with an added "to be continued" vibe as a bonus. 


These donuts were airy yet substantial, light, buttery, and easy to pull-apart so as to enjoy all that fluffy goodness. I'm convinced they'd be great with a variety of toppings, icings, and probably plain as well. (An update late in the day solidified their awesomeness: I made 'em at 10am, and by 7 o'clock, they're gone.)

How do they compare to the fried kind? I have to admit, I've never been too much of a donut fan, but these are so tasty I don't feel at all tempted to try any fried-donut recipes at home; I'll leave all that hot oil to the pros. 

Congratulations to all my buddies -- we made it! -- and here's to to next adventure!

I'll catch you on the flip side. 


Baked Donuts Topped with Cinnamon Sugar
Yield: ~ 12 huge donuts
Adapted from Brown Eyed Baker 

Ingredients
1 egg
1/4 cup granulated sugar
1 cup of heated milk
1 Tablespoon active dry yeast
1 teaspoon salt
2 teaspoons vanilla extract
2 1/2 cups to 3 1/2 cups unbleached flour, divided, plus more for kneading
1 stick of unsalted butter, cut into 1 inch cubes

For Cinnamon-Sugar topping:
1 stick of butter, melted
1 cup granulated sugar + 2 Tablespoons cinnamon 

Directions
1. In a large bowl, beat together egg and sugar until well incorporated.
2. Add hot milk, yeast, salt, and vanilla.
3. Once well combined, add 2 cups of flour and stir together until it comes together (I used a spatula to do this). 
4. Start adding the butter a few pieces at a time and mix with the hand mixer until worked it. Now, you gotta work with me here, because I've adapted this recipe from instructions that use a stand mixer, which I don't have, nor will I have until I win one through the many food blog contests I enter to win one, or someone buys it for me off of a wedding registry.... one day...
5. Once you've added in all of the butter, add more flour until the dough starts to come together and is no longer sticking to the bowl. Thanks to Maryland humidity, I ended up needing the full 3.5 cups, but use your judgment.
6. Turn the dough out onto a lightly-floured surface and knead until smooth. 
7. Place in a lightly greased bowl and cover with a damp cloth. Allow to rise for one hour, until doubled. 
8. Punch down and roll out to approximately 1/2 inch thick. Since today's the day I move, and I don't have biscuit cutters out, I used a drinking glass that had a large rim, and a bottle cap to cut out the doughnut hole. Take this time to preheat the oven to 400 degrees F. 
9. Place the doughnuts about an inch apart on a parchment-lined baking sheet.  Cover with plastic wrap and allow to nearly double in size atop the preheating oven, approximately 25 minutes.
10. Bake until golden brown, approximately 5-8 minutes (if, you're oven is silly, keep adding 5 minutes and keep your eye on them til they're golden). 
11. Dip the warm donuts in the melted butter and sprinkle with cinnamon-sugar mix. 
12. Enjoy at once, and celebrate earning your Master's in English, being homeward bound, or whatever new adventures are in store for you now that school's out!  

I don't know why you say "goodbye." 
I say "hello."

Thursday, May 5, 2011

Indulgence

Because now, extra large photos fit on this delicious blog.

Wednesday, May 4, 2011

'Chefski's Potato n Plantain Pancakes

They kinda look like tostones*. But they're not (quite)!

I can take no credit here. This is all 'Chefski. After attaining great success making potato pancakes for a potluck, 'Chefski, mad scientist that he is, decided to kick it up a notch and add a Dominican twist to the dish. We took 'em to an Oktoberfest party a whiles back and they were a hit.

When I asked 'Chefski what inspired him, here's what he had to say:

Caro: so why'd ya do it?
'Chefski:  because i felt like making multi-cultural dishes. also i realized i love plantains very much, that they are also starchy, and wondered if they could also be used to make a pancake
i thought the mixed ones would be a nice representation of the fusion of our two cultures.

I couldn't have said it better myself.

'Chefski. Being a mad scientist. And a chef.  


'Chefski's Potato and Plantain Pancakes
Adapted from Allrecipes.com + 'Chefski's memory

 
Ingredients
4 large potatoes
2 green plantains
1-2 yellow onions (we love onions, feel free to stay at 1)
1 egg, beaten
a couple of Tablespoons of flour
salt and pepper to taste
vegetable oil for frying
apple sauce and sour cream for dipping

Directions 
1. Peel your potatoes, grate them, and keep them submerged in water to avoid oxidation.
2. While your grated potatoes are hanging out, peel and boil the plantains for a few minutes until they get a bit softer -- soft enough to grate. "Grate likewise," says Chefski.
3. Now, grate your onion(s). This can be down while the plantains are boiling.
4. In a large bowl mix together beaten egg, flour, salt, pepper, and your plantains and potatoes. The trick here is to get the mix to the right pancake consistency to fry. You'll know when they're ready because it won't be runny, yet each scoop will remain intact when it hits the oil.
5. Heat up some vegetable oil in a medium frying pan. Ladle spoonfuls of the batter into the hot oil and fry til brown n crispy.
6. Transfer to a paper towel-lined plate to soak up excess oil. 
7. Allow to cool a bit, and serve. Place sour cream and apple sauce within arm's length. Wow your friends.


Sizzlin'


* tostones are flattened, double-fried green plantain rounds.

Tuesday, May 3, 2011

Nick's Orange Tofu

Dude! This is Amazing!

I'm not even going to get into the fact that it's been way too long since I've blogged about cooking, or cooked a blog-worthy recipe. Tonight I came on here to find my favorite tomato sauce recipe, and when I went downstairs to the kitchen to get it started, I found my buddy Nick in the end stages of making the delicious plate photographed above.

He was kind enough to share, and let me tell you --  Nick is a star chef and he doesn't even tell anyone! The dish is Orange Tofu -- his spin on Asian Orange Chicken. Ridiculously good. 

So good I had to photograph it and record this moment. I need to make it someday soon.

Yum.