Sunday, December 26, 2010

French Butter Cookies


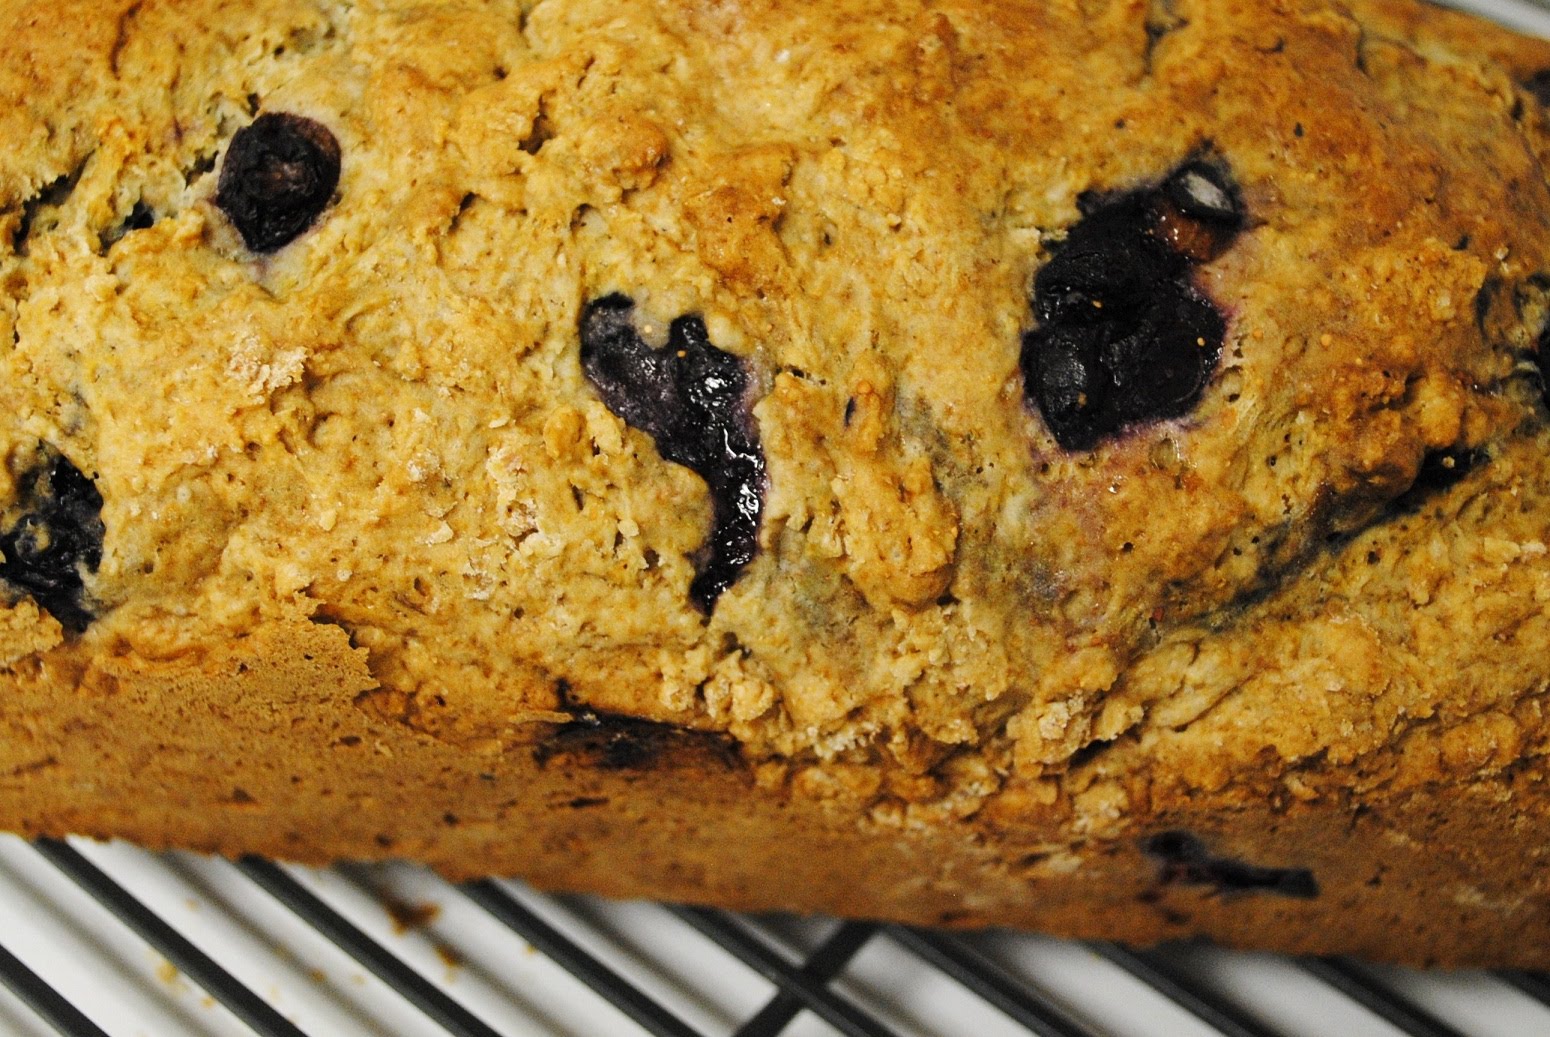
For this year's Second Annual Make-Christmas-cookies-for-Chefski's-family (and mine!) Baking Day,  I decided to try something a little special, a little nostalgic, and I knew I'd found what I was looking for when I stumbled on a recipe for French Butter Cookies. You may remember these from that ubiquitous blue tin often sold in drug stores or ::gasp:: Woolworth's of yore. Buttery, even sandy-feeling (in a good way), these cookies take a bit of time and effort, but it was worth it just to hear my mother tell me how much she really liked them -- and she's not even a cookie person!

Here's how I adapted the recipes I found on Annie's Eats:

French Butter Cookies

For the dough
1 large egg
10 Tablespoons unsalted butter, softened
1/3 cup plus 1 Tablespoon sugar
1/4 teaspoon salt
1 teaspoon vanilla extract
1 1/2 cups unbleached all purpose flour*

*For the Black n Whites, make one batch of FBCs as directed, and one using only 1 1/3 cups flour + 1/4 cup Dutch-processed cocoa powder

For finishing
1 large egg white + 1 teaspoon water, lightly beaten
Turbinado sugar for sprinkling 

Directions
1. Soft boil your egg by placing it in a pot of water, with about an inch covering it.  Bring the water to a boil, then remove the pot from the heat and allow the egg to sit in the boiling water for 10 minutes.
2. Next, place the the egg in a bowl of ice water and let stand for 5 minutes. This will make peeling the shell off much easier.
3. Separate the white from the yolk, and discard (read: eat) the white.
4. Place the yolk in a large bowl. Add the butter, sugar, and salt, and then with a hand mixer beat the mixture until light and fluffy. Be sure to scrape down the bowl occasionally as the mix attempts to escape your bowl.
5. Add vanilla. I actually went up to 1 tablespoon for my cookies, and was so pleasantly surprised by the vanilla flavor that I'll definitely be doing this in the future.
6. Add the flour and mix until just combined. Using a spatula, press dough down into a ball.
7. If you're making the regular butter cookies, divide you dough in half, and then roll each ball into a log about 6 inches long, with a 3.75 inch diameter. Roll in parchment paper, twisting the ends closed, and chill in the freezer for an hour. As this point, you may freeze your dough, in freezer bags, for up to two weeks (this will definitely come in handy in the future).
8. After your dough has firmed, you may slice the dough into 1/4 inch rounds. Brush on the egg white mixtures and sprinkle with turbinado sugar. These cookies will be so sparkly and crunchy once baked!
9. Bake on a parchment-lined baking sheet for 15 minutes at  350 degrees F. Enjoy.

Black and White Spiral Cookies


Basically the same ingredients as for the French Butter Cookies, and you'll need one batch (or a 1/2), but, as stated above, to make the "Black" part, sub in 1 1/3 cups flour + 1/4 cup Dutch-processed cocoa powder in place of the 1.5 cups flour.

In my case, I couldn't find Dutch-processed cocoa, so I consulted baking 911 on how to substitute natural cocoa powder for Dutch (3 Tablespoons natural + 1/8 teaspoon baking soda = 1 Tablespoon Dutch).

Directions
1. If you made full batches of each, divide in half as directed for French Butter Cookies.  
2. Roll each out separately into rectangular sheets about 6 by 8 inches, and 1/4 inch thick. 
3. Place one chocolate sheet atop a vanilla sheet, then starting at the long end, roll the dough cinnamon-roll style, creating a tight log.
4. Chill in the freezer for 1 hour. Slice and bake for 15 minutes at 350 degrees F.
5. If you've got extra chocolate dough, as I did, just roll those up a la French Butter Cookies, chill, slice, and bake on their own.
6. Allow to cool, pack up and deliver as gifts :)

φασολάδα (Fasolada: Greek Navy Bean Soup)

For the sake of transparency, I'll be upfront and admit it: I didn't follow the recipe. Sure, sure, I often make tweaks, but seriously, this time I was forced to take shortcuts because I just got back from proctoring an exam, have yet to grade them before the 48 hours I'm allotted to calculate grades is up, and I'm leaving the state for Winter Break in the morning. I wasn't going to go to Giant for this one, but I also didn't want to eat PB&J for dinner. So this is what I made, in such a reductive fashion that I'm not evens sure I can still call it φασολάδα (fasolada). 

φασολάδα (fasolada)
Adapted from Elly Says Opa!

What I did...

Ingredients:
1- 15.5 oz can Goya navy beans
1 - 15 oz can of diced tomatoes
a large pinch of oregano
a pinch of red pepper flakes 
1 Tablespoon garlic powder
salt and pepper to taste

Directions
1. In a medium pot, heat beans with liquid until boiling.
2. Add diced tomatoes, and the rest of the ingredients, mixing well to incorporate fully.
3. Keep heatin' til it's ready for eatin'!

And let me tell you -- this was delicious!
 
The recipe says something more like this...

1lb dried haricot/navy beans 
12 cups water
1.5 cups crushed tomatoes
3-4 bay leaves
1 Tablespoon oregano 
a pinch red pepper flakes
1/2 cup chopped parsley
3 carrots, chopped
3 stalks of celery, chopped
1-2 onions, chopped
4 garlic cloves, thinly sliced
salt and pepper to taste

Directions
1. After rinsing and picking out any unsightly beans, place your beans in a pot and fill with water such that 3 inches or so cover them. Allow to soak overnight, then drain the water.
2. Add water to the beans so that they are, again, covered by a few inches. Bring the pot to a boil and cook for about 10 minutes. Once cooked, drain the beans.
3. Add the 12 cups of water to the pot. 
4. Add all of the remaining ingredients, except for the salt (remember, beans, for whatever reason, refuse to soften post-salt!)
5. Once the pot comes to a boil, cover and reduce the heat to a simmer, and allow to cook for 1.5 hours. 
6. After 1.5 hours have elapsed, uncover the pot and cook for another 30 minutes, or until the beans have softened and the soup is thick (this is where you may need to add water). 
7. Add salt to taste.

Sunday, December 19, 2010

Ensalada Rusa (Russian Salad)


Think Pink: Potato-Beet-n-Egg Salad

At every Dominican gathering, there are a few things you can always count on: Family, Food, and Music. That means pernil, platanos, and a personal favorite, ensalada rusa -- "Russian Salad." Now, I can't be sure how truly Russian this is, but what I can tell you is that it's a Dominican classic. I already know Mama Tilde will be serving this up for Nochebuena, Christmas Eve, which is when we traditionally eat the big holiday meal. I've always found it goes really well with Tilde's sometimes-dry-yet-somehow-still-succulent pork, taken in one forkful. It's also been very well-received by my Polish friends (one word: potatoes), so I'm thinking it's a keeper for when 'Chefski and I open up our fusion restaurant one day.

Other Dominican traditions include dressing the birthday girl 
to match her Dominican birthday cake!
(Caro, Age: 4) 

Sometimes my mother makes it without the beets, but I'm a fan of the pink hue the dish takes on with this addition, so I always add a can. You can also add peas or corn or carrots... whatever you like.


The Egg Salad of My Childhood

Ingredients
4 medium potatoes
5 eggs
1 can sliced beets
1-2 Tablespoons mayonnaise
capful of white vinegar
salt and pepper, to taste

Directions
1. Peel and halve the potatoes, and boil in a large pot of salted water until a fork pokes through them easily. Don't overcook, otherwise you'll have some mashed potatoes.
2. Meanwhile, hard boil your eggs (sometimes I do this in the same pot as the potatoes, so that they all cook simultaneously).
3. While your eggs are hard boilin', drain the can of beets and cut the slices into cubes. Throw those in a large bowl.
4. Once your eggs are ready, set them aside to cool. Once they aren't too hot to handle, peel the shells off and cut the eggs into cubes. Throw these into the bowl with the beets.
5. When the potatoes are ready, drain them of their water and run cool water over them (this is to make them easier to handle). You've probably figured out the pattern by now: slice and dice them into large cubes. Throw 'em in the bowl.
6. Add the mayo to the bowl, along with a bit of salt and pepper and the vinegar. Fold and stir everything with a large spoon or spatula. Adjust salt and pepper if necessary.

Thursday, December 16, 2010

Sourdough Rye Bread


This is probably one of the best breads I've made to date (and by "to date," I mean sometime last summer). I was in the midst of my sourdough obsession, and by that point I'd made a regular white flour starter (traditional and tangy, the way you'd imagine "sourdough" would taste), a whole wheat starter (tangier and more like a paste than a gooey yet dough-like base), and a rye flour starter (the tangiest of the bunch, with a very earthy scent). This bread is made with the latter.

Although I have since had to discard all of my starters, this is the bread that really convinced me of the value of cultivating your own baking yeast--not in place of, but in addition to store-bought yeast. This bread is so hearty, almost salty, so good with butter, preserves, hummus, and alone. It's the kind of bread you try to tear into with your bare hands, but if you've got small ones like me, you'll need a knife and feel kind of like a wimp for it. It's the kind of bread you feel proud to make, and will long to make once more...

...as soon as you've settled in a place where you can capture some wild yeast from the air again...

It's the kind of bread that makes me feel like a cowgirl.

I like that.

Sourdough Rye Bread
Adapted from Breadtopia 
Ingredients
1 1/3 cups water
1/3 cup sourdough starter*
1 3/4 cups rye flour
1 3/4 cups bread flour
2 Tablespoons unsulphured molasses
zest of one orange

optional: (I'll try these next time)
1 Tablespoon fennel seeds
1 teaspoon anise seeds
1 teaspoon caraway seeds

Directions 
1. Mix together water and starter in a large bowl.
2. Add molasses and orange zest.
3. In a separate bowl, combine all the flours and salt -- I used a whisk to get everything well incorporated
4. Using a large spoon, gradually stir together the flour mix into the wet ingredients. Once everything is well incorporated, cover with plastic wrap and allow to rest for 15 minutes.
5. After 15 minutes, stir together for another minute.
6. Allow to rest for an additional 15 minutes, then stir together again for another minute.
7. Cover with plastic and leave at room temperature for 12-14 hours.[Now, when I baked this loaf the 14 hour mark came at a bad time, when I was too tired to trudge through the next few steps, so I decided to turn this step into 24 hours at room temp, followed by overnight in the fridge. I had a yummy result regardless.]
8. Proceed to enjoy your life while this dough rises.
9. After the proofing time (those 12-14 hours), stretch and shape your dough into a round for baking. Cover with plastic wrap and allow to rest for 15 minutes (I mean, you've come this far, what's another few minutes, right?)
10. Since I don't have a proofing basket, I place a sheet of bounty in a bowl and dust it heavily with flour, then place the dough inside of it, just like I did when I made pumpernickel. Cover the dough with plastic wrap and allow to rise for 1.5 hours.
11. 30 minutes before baking, preheat your oven to 475 degrees F.
12. Score your dough with a sharp knife (this allows for expansion and a nice pattern to emerge atop the bread), and bake until the internal temperature is 200 degrees F. This took about 4o minutes for me, but I like to check once it gets golden, took it out to cool a bit and thumped the bottom of the loaf -- a hollow sound usually means your bread is done.
 

Wednesday, December 15, 2010

Raisin' Hell: Oatmeal Raisin Cookies

Forgive the dark photos -- I took these way before I got my fancy-schmancy Nikon.
 
My first real attempts at baking were during senior year in college, and while I've never been too much of a cookie fan, I know other people are. It's probably something about how portable and usually portion-controllable they are. At least that's my guess. Plus, they're easy to make and give away, so I've tried to become adept at a few different kinds. I started with my favorite, the (usually) least sweet of all: oatmeal raisin. It's the kind of cookie you can trick yourself into believing is good for you. I mean, come on! Raisins? Oatmeal? How could it not be good for your heart?

I got this super easy recipe for oatmeal raising cookies from the same book I found the baguette recipe I'm fond of. They're chewy, only use a few ingredients, and have always been a hit as a gift. 

Oatmeal Raisin Cookies
Adapted from The French Don't Diet

Ingredients
1/2 cup (1 stick) unsalted butter, softened
1/2 cup brown sugar
1 large egg
1 teaspoon vanilla extract
3/4 cup all-purpose flour
pinch, each, of baking soda, cinnamon, and salt
1 cup rolled oats
1/2 cup raisins

Directions
 
Preheat over to 350 degrees F

In a large bowl:
Blend the wet ingredients (butter, brown sugar, egg, and vanilla).

In another bowl:
Mix dry ingredients (flour, baking soda, cinnamon, salt, oats, and raisins) and then fold them into the wet ingredients.

Scoop the dough, in ping-pong sized balls, onto a cookie sheet. Bake for 12-15 minutes, until golden.

Allow to cool, then munch away.

Le Pain Quotidien's "Seasonal Fruit Crumble"

Last August when I was doing some late-summer cleaning in preparation for the various moves alluded to in my last post, I stumbled across this recipe card from Le Pain Quotidien. It was in the same pile as Ania's handwritten recipe for her delicious tomato-n-spinach pasta sauce. I have yet to make this fruit crumble, but I figured since I've enjoyed the food at Le Pain, I may as well save this recipe for future testing. Here it is (click the pic to enlarge):


Moves, Mice, and a Master-Mistress

It's all 'Chefski's fault. 
This Fall, he started his Docta-Docta training in the City-So-Nice-They-Named-Her-Twice.  
 
All right. I'm just going to jump right in here. It's been MONTHS since my last post and it has been killing my soul.

Seriously.

Killing. My. Soul. I've mentioned this before, but when all a gal like me does is use her brain to the point of exhaustion in an attempt to produce original thought, I get restless. I want to use my hands, knead some dough, let it rise, stir a pot, and make something good to eat. But I haven't really been able to do much of that in the last few months. Yes. Months.

But I've got good reasons. I swear!

There have been moves: from Washington to Washington Heights, to Columbia and Columbia Heights, from the District to the 'ville, from the Nation's Capital to the Capital of the World.

There have been mice: One even caught by yours-truly in a rat trap, properly double-bagged and disgarded whilst wearing latex gloves

And then there was this Master-Mistress of a Semester. For those of you who don't consider yourselves Shakespeare scholars, I direct you to Sonnet 20 and urge you to investigate the meaning of this hotly debated poem. For my purposes, all you need to know is that if you find yourself teaching 50 undegrads, applying to PhD programs, and taking three classes (one of which happens to be on Shakespeare), then you're entitled to invoke the androgynous, Janus-faced image of the Master-Mistress to describe how confusing, unsettling, yet awe-inspiring your life has been.

Now that I've put all that on the table, let's get back to cooking and baking! I've got a bunch of posts I'd been meaning to write up on meals made months ago, and several treats I've been dying to make once I gain access to a clean, reliable kitchen. Stay tuned.

The GWB will always be New York to me.

Saturday, July 17, 2010

Sourdough Pizza Dough

 Check out that golden crust. 
... and those jalapeños and Polish ham!

The last two times I've made this recipe (most famously for 'Chefski's family one weekend, followed by mine the next), the pizza's flown off the plate before I had a chance to photograph it. They say third time's a charm, and the fact that I've made it thrice has got to mean something good :)

Making pizza dough using sourdough starter is not only a great way to use your starter, but the resulting dough's got a richer, mildly tangier flavor than your average dough. It's so good, I am now convinced that even my other recipe could use a day's rest in the fridge before I use it. Here's to the power of slow fermentation!


Sourdough Pizza Dough 
Adapted from The New York Times which is adapted from “Artisan Breads Every Day,” by Peter Reinhart (Ten Speed Press, 2009)

Ingredients
1.25 cups of stiff starter 
1.25 cups all-purpose flour
1 cup bread flour
1 1/3 cups whole wheat flour
1 cup water, room temperature
4 teaspoons salt

Directions 
1. In a medium bowl combine starter and water and mix with a wooden spoon until soupy.
2. In a larger bowl, combine flours and salt and whisk together to blend. 
3. Add starter mix to flours and stir with a wooden spoon until you start to form a ball in the center of bowl. Let dough rest for five minutes.
4. Knead dough inside the bowl for 5-7 minutes until all the flour is incorporated and you have a smooth ball.
5. Cover with plastic and let rest for 3-4 hours (because I planned on freezing this, I let it rest for 2.5 hours, just so that some of the flavors started to develop, then went on to step 6).
6. Cut dough into 4 or 5 pieces, depending on whether you want 12-inch or 9-inch pizzas. (At this point I separated the balls into their own ziplocks and stored in the freezer). 
7. (After defrosting, or if following the real-time schedule) Turn out each piece onto a lightly floured surface and knead 2-3 times until smooth. 
8. Place each piece in a large enough bowl or bin to allow it to double in size. Cover with plastic wrap, loosely, right atop the dough, and cover lid of container. 
9. Refrigerate for 24-48 hours before shaping and baking.
10. To bake: Top as desired, and bake atop parchment paper (trust me, this dough tends to stick) in a super-hot oven (as hot as possible) for 10 minutes, following the directions from the last pizza I made, until cooked and bubbly. 

Why make one at a time when you can make two?

Monday, July 5, 2010

'Tilde's Lasagna

My absolute favorite lasagna. Ever. Since before I was born.

When my Ma was pregnant with me she regularly met with a nutritionist who advised her on how to keep herself and the Caro-to-be healthy. This is the lasagna she taught my mom to make, the one she ate whilst I was a bun in the oven, and the one I have loved ever since. 

Now, don't expect this to be traditional in any way. Instead of tomato sauce, tomato soup forms the sweet base for the ground beef (or, in my update, sometimes turkey) filling, and instead of Mozzarella and ricotta, we've got Swiss or Provolone and --get this-- cottage cheese! If you keep your cheeses low-fat and go for lean meat (or sub in veggies) this is lasagna might even fall on the "healthy" side. That being said, I know Sandra Lee (my favorite and yours!) has gotten quite a bit of bad press about her own cottage cheese & soup recipe... and I'm not a fan of things semi-homemade.... Still, I'm telling you, I will eat this lasagna for days and days, straight from the fridge and cold, for breakfast, lunch and dinner. 

And that's why I make this once or twice a year.

Oh, and one more thing: I recently served this to a couple of picky eaters whose Mama said they don't eat cottage or Swiss cheese. Well, they do now :)  

'Tilde's Lasagna

Ingredients
1 box dry lasagna (you'll need about 13 pieces)
2- 8 oz cans Campbell's Tomato Soup
32 oz tub of low-fat cottage cheese
1- 2 packages of sliced, low-fat Swiss or Provolone cheese
1 lb ground beef or turkey
1 onion, diced
1/2 Tablespoon salt
1 Tablespoon garlic powder
about 1 teaspoon of oregano
grated Parmesan cheese 

Directions
1. Season your meat: In a medium bowl, combine ground meat, diced onion, salt, garlic powder, and oregano. You can mix it up with a spoon, but if you're like me, you're gonna want to get down in there with your hands and squish it all together. Just to make sure you get the seasoning on everything, you know? Set in the fridge for 15 minutes to let the spices do their thing a bit.
2. Meanwhile, bring a large pot of water to boil for your lasagna. You'll need 13 pieces, but I often cook 15 in case any break or tear as they move from the pot to the baking pan. When it finally does boil, add your pasta and cook for 8 minutes. Once cooked, drain and shower with cold water to cool.
3. In a large pot, heat a little bit of cooking oil on medium heat and add your meat. Cook until just brown, and add the two cans of soup plus two cans of water (just fill each can with water, stir around to get any leftover soup, and pour into the pot). Stir to combine and bring to a boil. Stir occasionally to break up the meat. Lower heat to a simmer and allow the sauce to thicken over 45 minutes. Once thickened, remove from heat and allow to cool slightly.
4. Now you're ready to assemble the lasagna! Lightly grease your 9x11 pan and lay down 4 strips of cooked lasagna, making sure the edges touch. Next, spoon some cottage cheese over each other strips to form a thin layer -- don't worry if you have gaps, just use enough such that it will last you for four layers. Next, ladle your meat sauce onto each lasagna strip. Lastly, take 1-2 slices of cheese, and tear them up and toss them on top of your lasagna -- they'll melt in the oven, so space them out and don't worry about covering every inch. Place three strips of lasagna atop the cheese and repeat the instructions in this step until you've used up your pasta. When you get to the top, generously sprinkle with Parmesan cheese.
5. Preheat oven to 375 degrees F. Bake for 40 minutes, or until the delicious aroma of lasagna fills your home and you just can't help yourself anymore.

Tuesday, June 22, 2010

Why Tempeh = Cotton Candy Sangria


Who knew I'd love soy so much? 

Google is great. You probably already knew that but let me tell you why:

"Vegan restaurant nyc cotton candy sangria" 

That's what I searched for, and my first hit (thankfully!) was  Sacred Chow the great vegan restaurant in NYC where I first tasted tempeh. My quick-witted, wonderfully hilarious, life-saver friend from my previous life* Swati took me there for brunch one weekend before I took the plunge back to school. I got some tasty vegan waffles, which were great, but one bite of her dish and I was smitten. Savory yet sweet, whatever it was she got, I wanted more of it. The problem was that weeks later, once relocated, I could not for the life of me remember what her dish was called. All I could remember was that Swati, who always envelops herself in the sweet scent of cotton candy, loves Sacred Chow's cotton candy sangria. The rest is Google history.

Tempeh's great because it has a TON of protein (a frequent must for 'Chefski), it's vegetarian, and unlike tofu, it's a got an earthy, whole-grain taste to it (at least the kind I get). Best of all, this is a one-pot/pan meal, all the better for clean up.

Here's to Swati: hugs, emoticons, and Barnum and Bailey's. Twice.

* my previous life as a full-time working woman in the business world.


Indonesian Curried Tempeh
Adapted from this recipe I googled.
Serves: 4

Ingredients
2 Tablespoons vegetable oil
250 g Tempeh (1 package of the stuff you kind find at Whole Foods)
1 bell pepper (any color) sliced
1 large sweet potato, diced
1 clove of garlic, minced
1/4 cup light coconut milk
1 chopped onion (I love the red ones)
1 Tablespoon curry powder
2 Tablespoons Tamari or Soy Sauce

Variations I like: A bag of frozen veggies, a splash of pomegranate molasses

Directions
1. Even though I listed the ingredients above in their chopped stages, I really do think step 1 is the slicing and dicing. I do all of this in one go.
2. Heat the oil in a large casserole or other stove-ready pan. Add the garlic and onion and toss around until fragrant. Or, as a Hungarian friend once told me "until the onions look like glass."
3. Add the tempeh, sweet potato, and bell pepper to the mix. If you're using frozen veggies, hold off 5-ish minutes so the rest of your food is a little cooked. All in all, this phase should last about 10 minutes.
4. Add coconut milk, curry powder, tamari sauce and/or pomegranate molasses and cook for an additional 10 minutes, tossing around the mix to coat everything well with your sauces.
5. Enjoy alone, with rice, or as a side to anything you like :)

Sunday, June 20, 2010

Sourdough Starter, Notes to Self

 Starter, Phase 2: Bubbly, and doubled in size in a matter of hours

My bubbly beast


Mother Starter


Notes to Self -- that is one of the purposes of this blog, after all ;):

 To feed starter: Bring refrigerated starter to room temp for an hour or so. Mix as follows to feed:  1/4 cup starter, 1/3 cup flour 1 Tablespoon + 2 teaspoons water. Stir, leave at room temp overnight, put back in fridge. Good to go.

Chicken Chili


A few weekends ago 'Chefski and I finally made it out to Ben's Chili Bowl, which inspired me to try and make my own spicy, meaty dish. At the time I felt a little bit of red meat guilt (have you ever had a chili-covered beef burger with a chili-drenched hot dog and a side of chili cheese fries? Yeah... 'Chefski and I did, and we felt it), so I went with chicken to lighten it up a bit. Next time I'll try ground turkey for a nice compromise, along with some extra cayenne so make it just right :)

Chicken Chili 
Adapted from Ina Garten's recipe on Foodtv.com

Ingredients
1/2 lb red beans (if using dry, be sure to cook these according to the instructions ahead of time)
1 medium onion, chopped
2 cloves of garlic, minced
2 chicken breasts, still on the bone
1/2 yellow bell pepper 
1/2 of a 28 oz can of whole peeled tomatoes
1 teaspoon chili powder
1 teaspoon ground cumin
1/4 teaspoon dried pepper flakes, or to taste
1/4 teaspoon cayenne pepper, or to taste
salt and pepper to taste
olive oil

Directions 
1. Preheat oven to 350 degrees F.
2. Rub a little olive oil onto your chicken and lay on an aluminum foil-covered baking sheet. Sprinkle with salt and pepper -- be generous!
3. Roast the chicken for 30-40 minutes, until cooked through. While this is cookin', work on the rest of your chili.
4. In a medium pot, heat a bit of olive oil. Saute your onions for 5-10 minutes on medium-low heat until translucent. Add the minced garlic and cook for an extra minute. 
5. Add the spices, and the bell pepper and cook for another minutes.
6. Add the tomatoes and crush a bit with a large spoon (I like chunky chili -- if you prefer a smoother texture, just pop the tomatoes into the blender before adding).
7. Bring the mix to a boil and then simmer until the chicken is done (about 30 minutes).
8. When the chicken is cooked, set aside to cool for a few minutes (so the juice doesn't drip right out!), then pull it off the bone and chop into 3/4-inch chunks. 
9. Add to the chicken to the chili and simmer for another 20 minutes so the chicken absorbs the chili's flavors.
10. Eat out of a bowl or in a tortilla. 

Friday, June 18, 2010

Blueberry Sourdough Bread

Craggy n Crunchy

Feed your sourdough, make something new!

I made this for a potluck, poolside cookout last weekend. Boy, was there sun! And the humidity! And this Dennis-the-Menace-of-a-kid who squirted us all with his little water gun!

At least the water was refreshing, and the company was great.

And the food! Burgers and beverages and blueberry bread!

The pros of of this latest sourdough creation: crispy, crunchy crust. And hearty, too, since I used a bit of whole wheat flour. No real cons, though next time I'll add in some yogurt or apple sauce for the moisture lost from subbing out bananas.

To make, simply throw in 1 cup blueberries instead of banana into this recipe, and for extra heartiness, use half whole wheat flour, half all-purpose.

Friday, June 11, 2010

Mongolian Beef... or Chicken; or, Our Favourite Sauce

Like spicy? This is the sauce for you.
Pictured: Spicy chicken atop brown rice, accompanied by some sassy veggies.

I know I've done something right whenever I hear 'Chefski request "that pepper flake sauce you make." Here's one of the first "fast food" recipes I tried straight from a food blog; the resulting spicy-sweet sauce has become a go-to around here. Use it on beef, chicken, tofu, or a mountain of veggies.

Follow the full recipe and you'll have made your own, home-made "Chinese" food at a fraction of the cost  (with some oil and fat savings as well!). After you've made it once, though, you'll have the basic idea:

soy sauce+sugar+cold water+corn starch+ red pepper flakes = the quick, spicy sauce you'll love.

And to think, I used to not like spicy food! What a difference a 'Chefski makes :)

Mongolian Chicken/Beef
Adapted from Elly Says Opa!
2/3 lb. flank steak, sliced across the grain, or 2 skinless chicken breasts, cubed
3 Tablespoons corn starch
3 teaspoons canola oil, divided
1/2 tablespoon ginger, minced
2 cloves garlic, minced
1/3 cup low-sodium soy sauce
1/3 cup cold water
1/4 cup brown sugar
1/4 teaspoon red pepper flakes (or more!)
veggies

1. Dry your protein with a paper towel to make sure it is completely dry. In a bowl, toss together your protein and cornstarch. You want the pieces to be coated, but dust off any excess.
2. In a small bowl or a mug, combine soy sauce, water, brown sugar, and red pepper flakes. Set aside until it's time to add to the protein.
3. In a medium saute pan, heat about 1.5 Tablespoons over medium-high heat. Add the garlic and ginger and cook for about 1 minute, until fragrant.
4. Add beef or chicken and cook, stirring until brown. If your chicken is thick, make sure to keep going until fully cooked. 
5. Add the soy sauce mix and allow the sauce to thicken. If your sauce isn't thickening (it's happened to me!), just mix together some cold water and cornstarch in a mug, then slowly add a bit to the pan. That should do the trick.
6. Add veggies (thawed and drained, if using frozen), toss around to coat, and you've got yourself a meal.

Monday, June 7, 2010

Banana Bread, Powered by Sourdough

A sweet treat made with starter

Whenever you feed your sourdough starter you're usually called upon to discard a portion of it. You don't technically have to throw it away, but you probably want to get rid of it somehow, since feeding results in growth, and there's only so much starter you want to have on hand at any given moment.

Herein lies one of my new-found quests: to uncover recipes for that chunk of starter I want to get rid of when I feed my cultures.

Using sourdough starter instead of baker's yeast in this version of banana bread resulted in some lovely bubbles inside the finished bread, along with an every-so-slight tanginess that kept this treat from being overly sweet or dense, yet still very moist. It's still very much banana bread; not a rustic loaf, but a dessert or breakfast treat -- the starter simply acts as a leavening agent.

To keep myself from pigging out on it I sliced it up before storing in Ziplock bags in the freezer -- all the better to microwave a slice or two as a snack. Even then, it tasted as if it were fresh from the oven :)

Sourdough Banana Bread
Adapted from The Fresh Loaf

Ingredients 
a scant 1/3 cup of canola oil (you could use butter here)
1 cup sugar (or, in my case, 1/2 cup sugar, 1/2 cup Splenda)
1 egg
2 cups all-purpose flour
1 teaspoon baking powder
1/2 teaspoon baking soda
1 teaspoon salt
1 cup mashed banana (2-3 bananas)
1 cup sourdough starter
3/4 cups chopped walnuts
1 teaspoon vanilla extract

Directions
1. In a medium-sized bowl, cream together the sugar, egg, and oil using a hand mixer.
2. Stir in bananas and sourdough starter, but don't overmix. Add the vanilla extract.
3. In a separate bowl, combine flour, salt, baking soda, and baking powder. Add walnuts.
4. Add flour mixture to the liquid ingredients and stir together until just combined.  Pour into your loaf pan.
5. Bake in an oven preheated to 350 degrees F for an hour, until a knife or toothpick inserted in the center comes out clean :)

Sunday, June 6, 2010

Moro de Habichuelas Negras (Rice and Black Beans)

Just like Mami's

As far as I'm concerned, you really can't go wrong with rice and beans. It's funny: it wasn't until I was eight or nine that I became a real fan of beans, despite their being a staple in Dominican cuisine, but what can I say? I love 'em now.

Apparently a traditional Cuban dish, Moro de habichuelas negras is black beans and rice all mixed together in one pot to cook. The word "Moro" means "Moor" (think: Othello) and thus refers to the black beans. Moros y Cristianos -- Moors and Christians -- is another name for this dish I'm come across, cristianos referring to the white rice. What these names intimate is the history behind the Muslim-Christian encounters in Spain and North Africa, a history transported to the Caribbean and commemorated by food. In my interpretation, though, this isn't just a story of conflict, but of ultimately merging together. Moro needs both elements to be this tasty, and as a product of the US and the Dominican Republic (a blend in its own right), I'm all for mixing.

The recipe I adapted this from says it yields four servings... maybe four HUGE servings, but I decided to keep this proportion of ingredients because this dish keeps well both in the fridge and in the freezer It microwaves really well (just sprinkle a little water on top beforehand), and is perfect for a quick lunch, part of dinner, or in a burrito. 

It also doesn't hurt that The New York Times considers it one of its "Recipes for Health."

Moro de Habichuelas Negras (Black beans and Rice)
Adapted from Dominican Cooking (with several changes based on years of tasting my mom's)

Ingredients
4 cups white rice
2 cups cooked black beans (going with a can of Goya makes this faster, but you can also follow my own Dominican bean recipe)
6 cups water
1 Tablespoon tomato paste
a few slices of green bell pepper
pinch of oregano
1/2 teaspoon garlic, minced
1 teaspoon parsley, finely chopped
1 teaspoon cilantro, finely chopped
1/2 Tablespoon salt (to taste)
Canola oil

Directions
1. If you aren't using a can of beans, cook them a la Dominicana. I usually try and make a big batch and freeze whatever I'm not going to use since it does take a while. Skip step 2 if you use the recipe I linked to.
2. In a large pot, heat about 1 Tablespoon of canola oil on medium heat. Add bell pepper, oregano, parsley, cilantro and garlic, saute for a minute. Add cooked beans and tomato paste, and stir to combine all the flavors.
3. Add water and rice to your pot, as well as the salt. Stir to combine and let it all come to a boil. Stir occasionally to keep from sticking. When the surface water has evaporated, stir once more and cover with a tight fitting lid.
4. Set the heat to low, and simmer for about 20 minutes.  Uncover, stir, and then cover your pot again. Turn off the heat and wait an additional 5 minutes -- the steam will unstick the rice from the pot!
5. Eat alone, as a side dish, or in a burrito for lunch :)

Friday, June 4, 2010

"Berkeley" Sourdough... District-Style

Not too shabby for loaf #1!
Since cultivating my own sourdough starter I've learned a lot about starters in general. For one thing, "starter" is a term used pretty loosely to refer to a fermented mix used to make bread, so the actual texture of the thing itself can be quite liquid or more on the stiff side, like mine. Yet again, here is proof that words come to mean different things when spoken by different people, and this is why I try to take the most relaxed approach to cooking and baking. I'm a big proponent of food-making being fun and uncomplicated, and that anyone who wants to can and should do it. I'm not trying to sell food, just enjoy the process of making it as well as the process of eating it!

Was this loaf perfect? Maybe not, but it sure tasted way better than all the debates and comments posted on various sourdough-crazed websites led me to believe it would be! They were all "I've killed off so many starters" or "my first loaf didn't taste like anything." Well let me tell you, mine was just as tangy as I like my sourdough, the crust was crispy, and the crumb (that's the inside part of the bread) was just soft enough to soak up the right amount of butter. Next time I'll be braver and let the loaf bake until it takes on the lovely reddish-golden hue of classic sourdough. And I'll dip it in some salted olive oil.

FYI: Sourdough bread takes some planning in advance -- this will take about 3 days to make. Again, most of that time is just waiting... but it's worth it!

"Berkeley" Sourdough Bread, Made in the District 

Ingredients
To create the starter for this bread you need:
a tangerine-sized piece of your starter, kept at room temperature for 6-8 hours
2 cups warm water
2 cups unbleached flour 

For the dough: 
2.5 cups unbleached flour
1.5 teaspoons salt
3/4 cup starter that results from the above
3/4 cup cool water

Directions
1. In a medium-sized bowl, dilute the tangerine-sized starter in the the 2 cups of warm water, and add in the 2 cups of flour.  Cover loosely and leave in a warm spot for 18-24 hours, until very bubbly.
2. The next day: In a large bowl mix together 2.5 cups flour, the salt, and 3/4 cups of the starter from the previous step (you can save the remainder for other sourdough projects). Add the water and mix in the bowl with a wooden spoon until you form a ball.
3. Turn out onto a well-floured surface and knead the dough to combine and form into a ball.
4. Place your dough-ball in a lightly-oiled bowl and leave in the fridge, covered, for 12-15 hours to rise. Once risen, leave at room temperature for 2 hours to warm up.
5. Divide dough into two loaves, form into baguettes (in my case, I formed them into flatter, wider loaves as an experiment), and place on a baking tray to rise for 6-7 hours (it was getting late when I made mine, so I only waited 5 hours).
6. Preheat oven to 450 degrees F. Using a sharp, serrated knife, slash the tops of the loaves a few times to aid in expansion. Since I don't have a spray bottle, I used my pastry brush to sprinkle some water on the tops of the loaves.
7. Place loaves in oven and either spray them again (if you have a spray bottle) or mist them again using the brush. Splash a bit inside the oven as well (just a bit!) to create steam. It helps give a nice crust while allowing the bread to rise. Repeat about 5 minutes into baking.
8. Bake for 25-30 minutes, until completely golden. Schmear with butter or other goodness.

 Buttery sourdough. Mmmmm....

Tuesday, June 1, 2010

Ania's Fresh Tomato & Spinach Pasta Sauce

Handwritten notes are still irreplaceable in my book.

Recently, I've made a real effort to throw away a lot of the junk I've accumulated over the past few years. It's amazing to me how despite several moves -- from dorm to dorm in college, from Ma's apartment to my own places, I've somehow failed to detach myself from the clutter I've accumulated.
Until now. Now, don't get wrong, I was by no means a hoarder. Still, I had a few papers too many, and perhaps just a small excess of unnecessary mementos lying around. The great news is, for some reason, something just clicked for me in the past year and a half and I realized, as corny as it may sound, that I don't need to hold onto objects as if they formed some kind of security blanket.

My home no longer resides in things, but in people.

This doesn't mean I'm ready to start living out of a single suitcase; it's just gotten a lot easier for me to distinguish the trash from the treasures.

Pictured above and transcribed below is one such gem I discovered in a recent purge of my room. A few times during senior year, Ania made this simple yet incredibly tasty pasta dish which perfectly incorporated two of my favorite farmer's market staples: spinach and tomatoes. As always, she was generous enough to share both the dish and the recipe. Just like my aunt's flan recipe, this sheet of paper managed survived three moves, and that's a bit of a wonder to me, which is why I thought it high time to save here :)

Thanks again, Ania!  

Fresh Tomato and Spinach Pasta Sauce
- 1 lb fresh tomatoes, diced
- 10 ounces fresh spinach, washed & chopped
- 3 glove cloves garlic, minced
- 1 medium onion, diced
- salt & fresh ground pepper to taste
- 1 TB olive oil

1. Oil a frying pan & place over medium heat.
2. Add onions & garlic & stir until they begin to soften. Stir in spinach & cook until it begins to wilt.
3. Add tomatoes, basil [Caronote: hey! that's not in the ingredients! :)], salt & pepper & cook for several minutes, until tomatoes are heated through.
4. Serve over pasta.

Monday, May 31, 2010

Pumpernickel


I admit it, I've been on a extra bit of a bread kick recently. It's just that if you buy only one loaf of store-bought, pre-sliced bread per week, and you and your 'Chefski use it all up on Sunday making that week's lunch for two, a bread-lover like me can get a little antsy. After attacking the fruit stash or making a smoothie, I'm still left craving bread as a snack. At least that's one explanation for my baking-fixation.

When I told my mother that I'd baked yet another loaf of bread the other day, she reasoned that it's probably because in many ways I take after my father, and as she is often quick to remind me, those on his side of the family are in constant need of creating something with their hands. My father used to take apart and build things all the time, and all of his siblings have some kind of hands-on hobby or job, be it repairing old cars, doing people's hair, or drawing and painting. I guess my contribution to the family tradition is making food for fun and not just for feeding.

I chose to tackle my first pumpernickel because I wanted to use some of the rye flour I'd gotten a while back, and I'm pretty happy with the results (check out the cool dots that accidentally formed in the process). In the future I think I'll try a sourdough version and maybe throw in some caraway seeds for a more typical American pumpernickel taste. 

I love the dotted crust.
(See step 5 for how it got this way)

Pumpernickel Bread
Adapted from Smitten Kitchen 

Ingredients
1 cup warm tap water
2 1/2 teaspoons active dry yeast
2 cups unbleached, all purpose flour
1/2 cup whole wheat flour
1/2 cup whole grain rye flour
1 Tablespoon non-alkalized cocoa powder
2 teaspoons salt
1 Tablespoon unsulfured molasses 
cornmeal for sprinkling bottom of loaf 
heavy baking pan

Directions 
1. In a medium bowl, whisk together water and yeast, and let sit for 5 minutes to activate.
2. Add molasses, and all purpose, whole wheat, and rye flours, as well as the cocoa and salt. Stir well to incorporate all the ingredients.
3. Once well-mixed, knead by hand for a few minutes to form an elastic and smooth dough.
4. Place dough in a well-oiled bowl and cover with plastic wrap. Let dough rise at room temperature until doubled.
5. Turn out dough onto a lightly floured surface and form into a round loaf by shaping into a sphere and tucking the dough under until you've created a smooth loaf. Here's how I got those cool dots: if you've got a special baking basket, invert your dough onto a heavily-floured napkin placed inside said basket. If you're like me and don't have one, just place a sheet of Bounty in a bowl, heavily flour it, and invert your dough into the bowl. Cover with plastic wrap and allow to rise until doubled. The dough rises into the basket (or bounty) and takes on the indentations of whatever's under it.
6. When your dough is almost done rising, preheat your oven to 500 degrees F. Be sure your rack is in the middle of the oven.
7. Sprinkle some cornmeal on a baking pan (since I have no baking stone), invert your loaf onto the pan, and score the top of your loaf using a sharp knife (I made an "X" shape, but some bread bakers get really creative with this step and make some great patterns). Feel free to sprinkle some cornmeal on top for good measure. Place in oven.
8. Lower your oven's temperature to 450 degrees F and bake for 40 minutes. I know my dough was particularly dense on the day I made it, so check for doneness/ add a few minutes if necessary so that you don't have raw bread.
9. Remove from oven and place on a wrack to cool. As soon as it was no longer steaming hot (but still warm), I enjoyed it quite thoroughly with a little butter.

Sunday, May 30, 2010

Wild Yeast Sourdough Starter

Technically, this baby's still called "seed culture"

In between lazing about and watching Law and Order: SVU (oh, and CSI too) I've been running a very important experiment involving the cultivation of wild yeast and lactobacilli.

No, I'm not helping 'Chefski with his labwork -- I'm making sourdough bread. Here are some fun facts related to my project:

Did you know that in order to make sourdough bread, you must begin with a sourdough "starter" which can be either procured from a friend, or made by mixing together flour and water (or in my case, unsweetened pineapple juice) and letting it ferment for a few days? During this time, wild yeast basically hop into whatever container you're using and have a fun time producing gas and interacting with bacteria that can be used to make bread. This process takes days, and involves stirring, adding water and flour, and basically babysitting your culture to make sure it stays alive. Some starter recipes call for active dry yeast, just because it isn't always so easy to catch wild yeast in today's über-clean kitchens. In either case, there's more waiting than actual physical labor.

Once you have a starter you use a part of it to make bread and save the rest ("feeding" it flour and water on a regular schedule, indefinitely) to make a variety of baked goods with. This I have done, and now onto the process of making the bread itself. This will take another 18-24 hours (mostly of waiting) before I can produce a loaf. I'm following a recipe for "Berkeley Sourdough," and I'll post about my results in a few days.

Speaking of Northern California, did you know that San Francisco is famous for sourdough and that the region's bread contains it's very own unique bacteria called Lactobacillus sanfranciscensis? Or that the illustrious Boudin Bakery, located at Fisherman's Wharf, has been making their sourdough using the SAME STARTER since 1849? Indeed, during the California Gold Rush, when packaged yeast was hard to come by and also unreliable as a leavening agent, people carried starters in pouches around their necks in order to make bread at their final destinations.

While I'd originally decided to try this bread because it seemed like a crucial step in developing as a bread-baker, learning about its ties to Northern California (where a very dear friend played host and tour guide a few months ago) added an extra layer to my desire to try and make my own. As a tribute to San Francisco, Berkeley, and the history of bread itself, here's to science in the kitchen.

... and now back to tending my cultures...

Your Very Own Sourdough Starter 
Adapted from The New York Times which is adapted from “Artisan Breads Every Day,” by Peter Reinhart (Ten Speed Press, 2009)   

Ingredients
16 ounces flour (which I converted to roughly 3.75 cups)
3 ounces unsweetened pineapple juice
10 ounces filtered water 

Directions
Day 1: Make seed culture. In a large glass jar or nonreactive* bowl, combine 1 ounce of flour (approx. 1/4 cup) with 2 ounces unsweetened pineapple juice. Cover tightly with plastic wrap and leave at room temperature. Be sure to stir with a wet spoon twice day.
Day 2: Between 24 and 36 hours later, bubbles should appear. Fact.
Day 3: After 48 hours (that'd be today!), add another ounce (i.e. 1/4 cup) flour and the last ounce of pineapple juice and stir. Cover with plastic wrap and leave at room temp, again, stirring twice a day with a wet spoon. 
Between Day 4 and Day 7: Between today and Day 7 (i.e. 1-4 days later) your seed culture will become foamy. When it does, in a medium nonreactive bowl, combine 2 ounces flour (1/2 cup) and 1 ounce filtered water. Add seed culture and stir to combine well. Cover with plastic wrap, leave at room temp, and stir twice a day with a wet spoon.
1-2 Days Later: By now your mix will have doubled. That means you're ready to covert it into a starter! Wooo hooo!
Making your starter
1. Combine 12 ounces flour (~2.75 cups) and 9 ounces filtered water in a nonreactive bowl. Add 4 ounces (~1/2 cup) of seed culture mix and discard the rest (or make a second starter) and mix until fully combined.
2. Turn out onto a lightly floured surface and knead for 2 minutes -- it should feel like a bread dough. Transfer to a nonreactive bowl and leave at room temperature until it doubles, about 4-8 hours. 
3. Knead lightly, then store in a container with a tight-fitting lid. It's gotta be big enough to allow for the starter to triple in bulk. Store in the fridge and then...

To be continued...

[Important note: Starters need to be "fed" every 5-10 days. To do so, follow the directions under "making your starter," substituting starter for seed culture.]

* nonreactive means that the material won't absorb odors or flavors and won't transfer them to your food, or deteriorate when it comes into contact with acids in foods. These usually include glass and stainless steel ... avoid plastic, unless it's food grade (ex: Gladware, has a #5 on the bottom).

Thursday, May 27, 2010

Oatmeal Buttermilk Bread


An oldie, but a goodie. I baked some of this a while back but I forgot to post about it, though that doesn't mean it's not worth sharing! I made a pretty small loaf the last time, and the slight sweetness made it a great carby-snack. Next time I'll see how sandwich-appropriate it is.

Oatmeal Buttermilk Bread
Adapted from Annie's Eats

Ingredients
1 1/2 cup rolled oats
1 cup boiling water
1/4 cup room temperature water
2 Tablespoons + 1 teaspoon honey, divided
2 teaspoons dry active yeast
1 1/2 cups buttermilk, room temp
1/2 cup extra virgin olive oil
2 1/2 cups whole wheat flour
2 1/2 cups all purpose flour
2 teaspoons salt

Directions
1. Place 1 1/4 cup rolled oats in medium bowl and mix in the boiling water. Let it sit uncovered for 10 minutes, stirring occasionally.
2. In a cup, combine yeast and the room temperature water. Let the yeast activate while you wait for the oats to finish soaking.
3. After 10 minutes have elapsed, in a larger bowl combine soaked oats, yeasty water, 2 Tablespoons honey, buttermilk, olive oil, 2 cups whole wheat four, and 2 cups all purpose flour. Mix together thoroughly, then add the remaining half cup of each flour.
4. Turn out the dough onto a lightly floured surface, and knead until smooth. If your dough is getting too dry, add a little water -- you want it to be satiny smooth. 
5. Place the dough in a lightly oiled bowl and cover with plastic wrap. Allow to double in size, about an hour or so, in a warm place.
6. Once doubled, turn out onto your lightly floured surface and gently flatten with your hands to release air bubbles. Form into an 8x 6-inch rectangle and form the loaf following the roll down and pinch method used to make the light wheat bread (basically for each roll, starting at the 6 inch side, push down to make sure it seals).
7. Place in your greased loaf pan, and make sure it reaches the edges. Combine remaining teaspoon of honey with 1/2 teaspoon of very hot water, and brush this over the top of the loaf. 
8. Sprinkle some oats on top and let rise for about 30 minutes, or until the loaf rises over the top of the pan. 
9. Preheat oven to 375 degrees F. Bake your bread for 1 hour. Once baked, transfer to a wire rack and allow to cool before slicing.