Friday, November 18, 2011

Béchamel Sauce


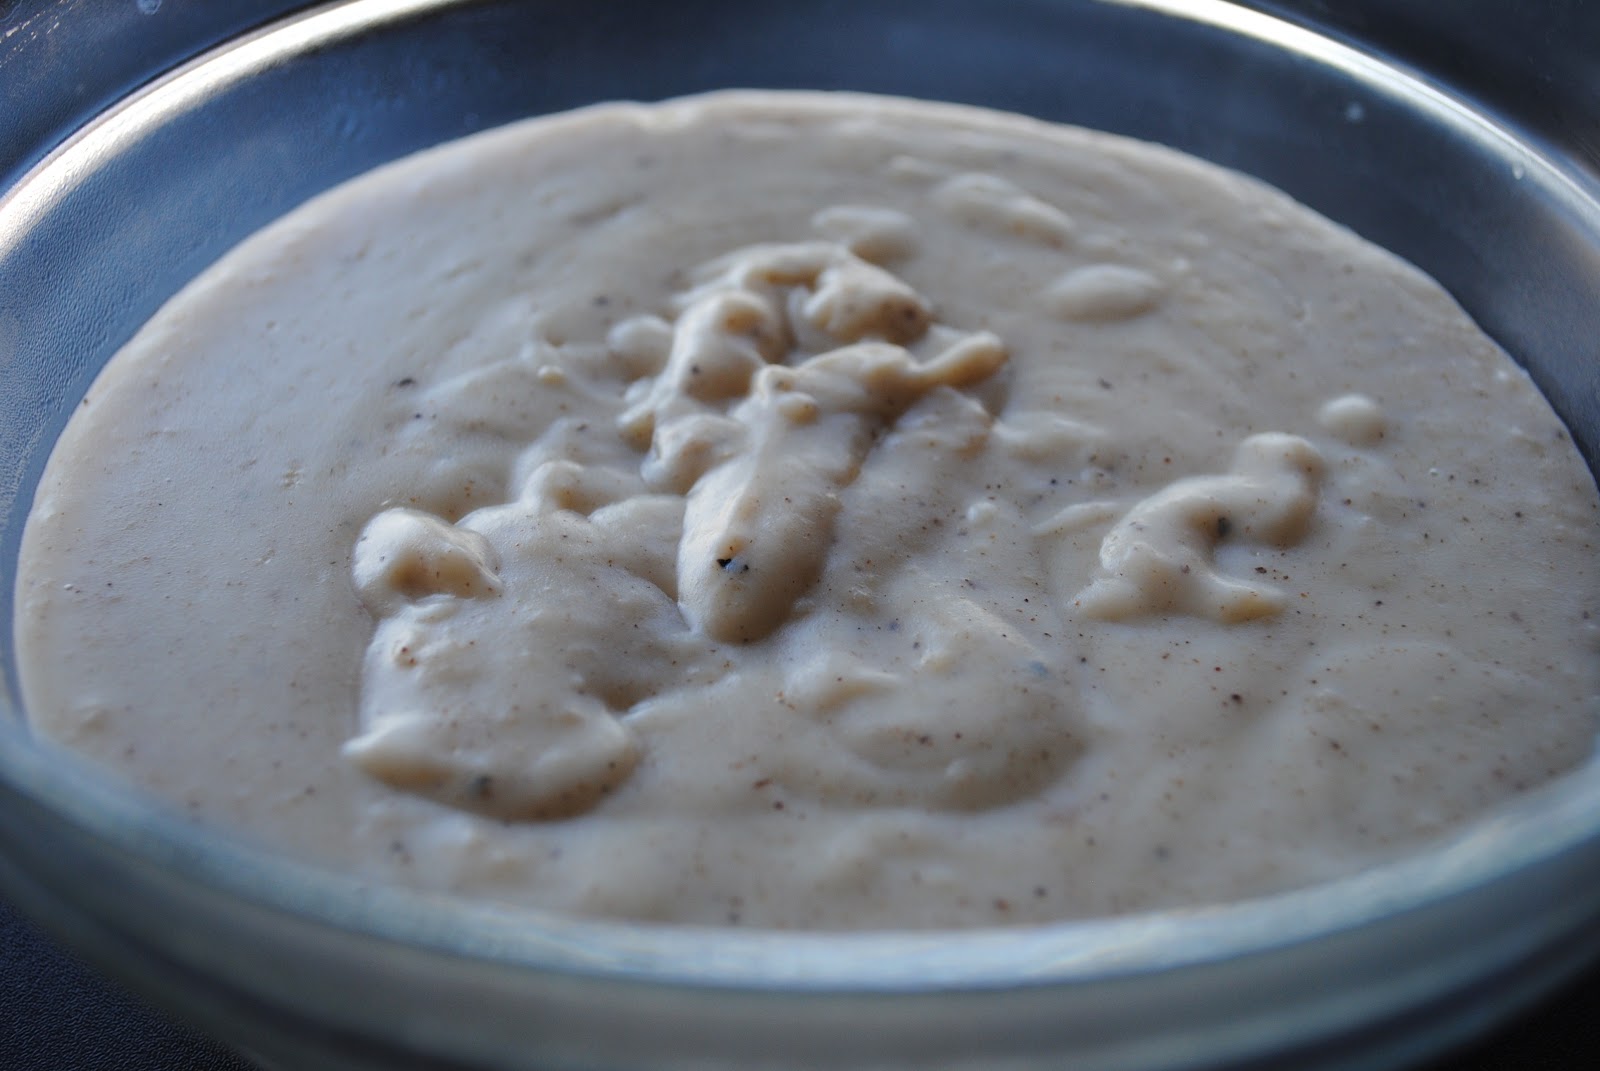
This sauce deserves its own post because I have already made it outside of the lasagna context from which I got the recipe (coming soon). So easy. So fast. So delicious! 

Béchamel Sauce
Adapted from Smitten Kitchen
Yield: approx. 4 cups sauce


Ingredients
4 cups skim milk
1 large clove of garlic, minced
1 stick of butter (8 Tablespoons)
1/2 cup all purpose flour
1 1/2 teaspoons salt
1 teaspoon ground black pepper
1/2 teaspoon ground nutmeg


Directions
1. In a medium saucepan, combine milk and garlic and bring to a simmer. Once heated set aside.
2. In another medium saucepan, melt butter (if you like, until it become brown butter). 
3. Add flour and whisk vigorously. Cook for 1-2 minutes, whisking all the while. This is your your roux.
4. Gradually add the milk to the roux, whisking all the while, until you have added all of the milk. 
5. Add salt, pepper and nutmeg, and keep whisking until your sauce thickens, about 3-5 minutes. 
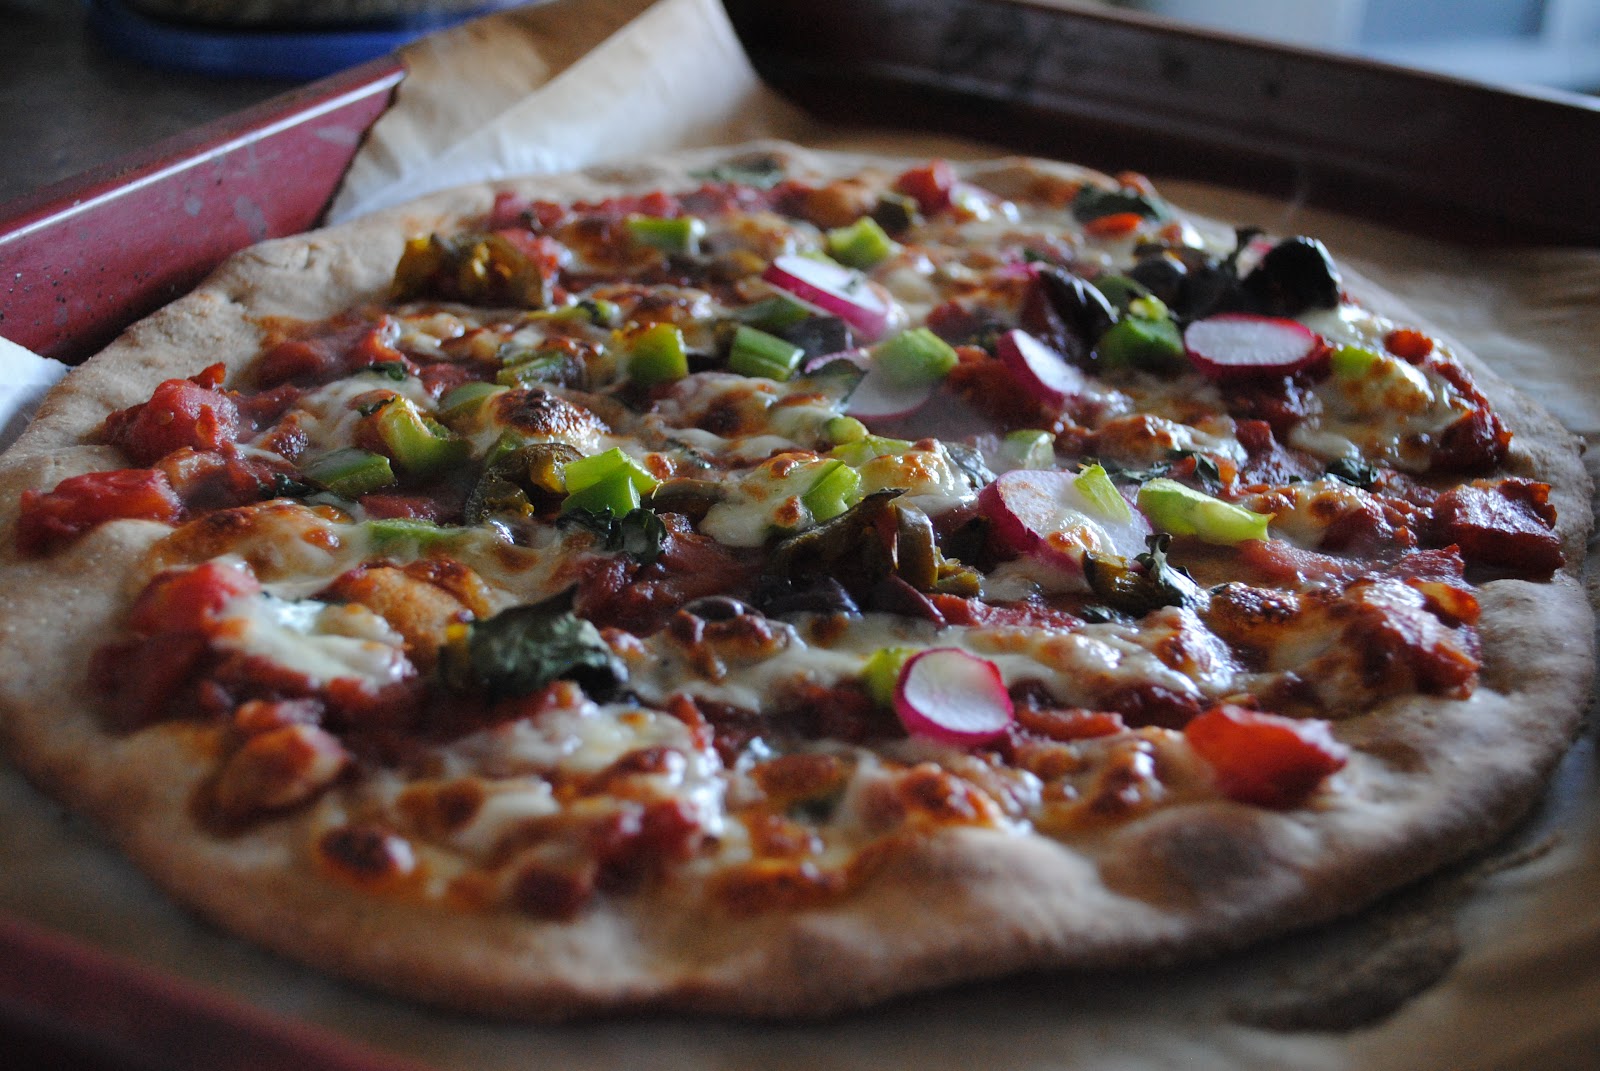
6. Serve over pasta, use in lasagna. 

Thursday, November 10, 2011

Vanilla Bean Pudding


Leave it to Deb from Smitten Kitchen to keep it simple: milk, sugar, cornstarch and an egg are all you need to get you started on the path to homemade pudding paradise.


When I was growing up my family would frequently host relatives visiting from the Dominican Republic, and my aunts and uncles would always be sure to bring with them a pile of traditional goodies. Among the treasures were queso de hoja (a wonderful, tangy white cheese), Double Bubble gum, these little green mints called Cristal Menta, all kinds of traditional confections, and, of course Maizena. Maizena is a brand of cornstarch popular abroad, and what I remember most were these little packets filled with differently flavored starches -- strawberry was my favorite -- to which you could add warm milk and create what I have since come to recognize as pudding. The recipe I made today, which is a real "back to the basics" kind of recipe, took me back to those times, and you know, come to think of it it's not so surprising. To my mind, pudding and childhood go hand in hand.


Vanilla beans, by the way -- they are somethin' else. I am completely sold on using them whenever possible in place of extract. 


Vanilla Bean Pudding
Adapted from Smitten Kitchen
Yield: Six 1/2 cup servings


Ingredients
2 2/3 cups skim milk, divided
1/3 or 1/2 cup sugar, depending on how sweet you'd like it
3 Tablespoons or 1/4 cup corn starch, depending on how firm you'd like it
1/4 teaspoon salt
Seeds from 1/2 vanilla bean (yum!) or 2 teaspoons vanilla extract
1 large egg


Directions 
1. Set 2 cups of milk over medium heat to boil. 
2. Meanwhile, in a medium heatproof bowl, combine sugar, cornstarch, salt, vanilla bean seeds (unless using extract... hold on for that). Feel free to throw the vanilla bean pod into the heating milk for added flavor. 
3. Slowly whisk in 2/3 cup milk a bit at a time in order to avoid lumps. 
4. Whisk in the egg.
5. Once milk has boiled, remove vanilla bean pod and slowly whisk milk into the bowl of mixed ingredients.
6. Return the mixture to the original saucepan, and bring back to a simmer while stirring constantly with a wooden spoon or spatula. 
7. Once it's simmering, cook for one more minute to ensure fully cooked egg and cornstarch. Don't jump the gun and take it off the heat before it thickens, though!
8. Remove from heat, add vanilla extract if you are using it in place of the beans.
9. Divide into small bowls (I ended up being generous and using just 4 lil bowls), and refrigerate for at least 2 hours, until firm.
10. Enjoy warm pudding goodness from the bottom of the saucepan to hold you over until you can get your hands on the cool pudding!

I love those flecks of vanilla bean!

Ginger Snaps


To me, ginger snaps are--along with anything pumpkin--a must-have of the holiday season. They're 1) easy to make, 2) full of spicy goodness, and 3) beautiful when covered in sparkly sugar. Now, I've recently heard about ginger snaps with a firey kick of black pepper... but that will have to be for another year. For now, these cookies have gotten me through the last three holidays of baked gift-giving, so it's about time I put them up here!

Ginger Snaps
Adapted from Food Network

Ingredients
3/4 cup unsalted butter, softened
1 cup light brown sugar
1/4 cup molasses
1 egg
2 1/4 cups all-purpose flour
2 teaspoons baking soda
1/2 teaspoon salt
1 teaspoon ground cinnamon
1 teaspoon ground ginger
1/2 teaspoon ground cloves
small bowl sugar (turbinado makes for extra pretty cookies) for rolling

Directions
1. In a large bowl, cream together the butter and sugar using a hand mixer.
2. Stir in the molasses and egg using a spatula.
3. Next, add 1 cup of the flour, baking soda, salt, cinnamon, ginger and cloves, stirring until combined.
4. Add the remaining flour, 1 cup at a time until fully incorporated.
5. Chill your dough in the freezer for 15 minutes. This will make it easier to shape.
6. Shape your dough into 1-inch balls, then roll them in sugar to coat the outside.
7. Bake on a greased cookie sheet (or on parchment paper) for 10 minutes in a 375 degrees F oven.
8. Enjoy with milk or pack up to send off as gifts.


Sunday, November 6, 2011

Super-Moist Pumpkin Muffins


I know I'm not alone in this, but I really do enjoy all things pumpkin. This year I was lucky enough to score a couple of real pumpkins for free and tried my hand at roasting them and turning their sweet flesh into puree for baking! I'm pretty sure the high water content of the homemade puree added to the moistness of these muffins, and I'll be hard pressed to use canned pumpkin in the future if I can avoid it. Here's to autumn lasting as long as possible and holding winter at bay!


Super-Moist Pumpkin Muffins
Adapted from Smitten Kitchen

Ingredients
1/2 cup sugar, 1/2 cup Splenda
1/2 cup vegetable oil (I bet I could have subbed in apple sauce for a bit of this)
1 cup fresh pumpkin puree
1 cup all purpose flour
1/2 cup whole wheat flour
1/2 teaspoon vanilla extract
1/2 teaspoon salt
1/2 teaspoon baking soday
forgot to use 1/2 teaspoon baking powder (whoops) but got a very nice rise anyway
1 teaspoon Pumpkin Pie Spice: 
1/2 teaspoon ground cinnamon
1/4 teaspoon ground ginger
1/8 teaspoon ground nutmeg
1/8 teaspoon ground allspice
sprinkle of ground cloves
2 Tablespoons sugar + 1 teaspoon ground cinnamon for topping
optional: top with roasted pumpkin seeds


Directions
1. Preheat oven to 350 degrees F. 
2.In a large bowl whisk together pumpkin, 1/2 cup sugar, oil, vanilla extract, Splenda, pumpkin pie spice, baking soda (and I'm guessing baking powder as well) and salt until smooth.
3. Add flours and whisk til just combined.
4. In a small bowl combine 2 Tablespoons sugar with 1 teaspoon ground cinnamon.
5. Fill your muffin tin with the batter, only about 3/4 full in each well. Top with cinnamon sugar and pumpkin seeds if using. 
6. Bake for 25-30 minutes until golden. 

Saturday, November 5, 2011

Snickerdoodles


The chewiness of these cookies each time you take a bite is unbeatable. 

Snickerdoodles
Adapted from Smitten Kitchen 

Ingredients
2 3/4 cup all purpose flour
2 teaspoons cream of tartar
1 teaspoon baking soda
3/4 cups olive oil (in place of 1 cup butter)
1 cup sugar + 3/4 cups splenda (in place of all sugar)
2 Tablespoons ground cinnamon
2 large eggs


Directions
1. Preheat oven to 400 degrees F.
2. Using a sieve, sift together flour, cream of tartar and baking soda into a medium bowl and set aside.
3. In a larger bowl, cream together olive oil (or butter) and splenda plus 3/4 cup of sugar using a hand mixer until smooth and fluffy, about 2 minutes.
4. Scrape down bowl and add eggs and beat using mixer.
5. Scrape down bowl using rubber spatula and add dry ingredients, stirring to combine. 
6. Once you've formed a dough, place bowl in the freezer for a few minutes until the dough is manageable. 
7. In a small bowl, combine remaining sugar and cinnamon.
8. Using a Tablespoon measuring spoon, scoop out dough and form into balls. Toss the balls, a few at a time, into the bowl of cinnamon sugar to coat.
9. Place cookies about two inches apart on a parchment lined baking sheet and bake for 10 minutes or less, until they crack in the center -- again follow your nose! Mine got a little extra crispy on the bottom because I ignored my senses :( These babies smelled delicious about 2 minutes before the timer went off, so I should have known, sigh. 


Dark as Midnight Cocoa Brownies


This recipe's from the end of the summer, back when I made those incredible chocolate chocolate chip cookies, and at the time I thought, "this has GOT to STOP!" This was the second game-changing recipe I'd found in short order, a recipe for a food I'd never really fancied before but has now finally and completely understood. 


Today's case in point: brownies.


I know part my previously "meh" attitude towards brownies has to do with the fact that my mom never made boxed cake mixes, or even cookies. In fact, she rarely made sweets, but when she did they were always traditional Dominican ones. But what I'm starting to realize as I expand my cooking and baking repertoire, the biggest problem, as I've noted before, is simply never experiencing a proper specimen. 


Before I tried this recipe, I always associated brownies with those overly-sweet, often-dry confections found at catered events. You know, the ones at the office brought in for you to snack on while your meeting runs over in the conference room, or a school-sponsored event made for schmoozing. The brownies were always too rich, too sweet, and to be honest, kinda boring. 


So what inspired me to try this recipe? I'm not really sure. Maybe I knew, deep down, that unless I tried to make these myself, I would never really know what good brownies could be.  And these brownies are RIDICULOUSLY GOOD! Dense but not overly sweet, and if you're big on freezing baked goods the way I am, you'll love knowing that if you microwave them straight from the freezer for 15 seconds, they are simply divine. Add a scoop of vanilla ice cream, and you may as well call it a life. I still have a few in the freezer, and I have to say it's pretty easy to keep myself from eating them: I don't want them to finish! 


Do yourself a favor and make these brownies. Slice 'em up into tiny squares so that when the craving strikes, you won't feel so bad about giving in. 


Dark as Midnight Cocoa Brownies 
Adapted from Smitten Kitchen


Ingredients
10 Tablespoons (1.25 sticks) unsalted butter
1.25 cups sugar
3/4 cups + 2 Tablespoons unsweetened cocoa powder (either natural or Dutch-processed is fine... I used Dutch-processed)
1/4 teaspoon salt (or a heaping 1/4 teaspoon sea salt)
1/2 teaspoon pure vanilla extract 
2 large eggs, cold
1/2 cup all-purpose flour
2/3 cups walnuts (I think I used more like 1/3, because this is optional and I just wanted a bit of something to cut the richness of the chocolate)


Directions
1. Position rack in lower third of oven, and preheat to 325 degrees F. 
2. Line a square baking pan (bottom and sides) with parchment paper or foil, allowing extra paper or foil to hang out of the pan (all the better to pull the brownies out in the end). If you don't have a square baking pan (I don't), here's an easy fix: use a rectangular pan, and fold your parchment as if you did have a square pan -- fill the extra space in the rectangular pan with beans or lentils, and this will serve as a "fourth wall" of sorts for what you're about to bake. 
3. In a medium, microwave safe bowl, combine butter, cocoa, sugar, and salt and microwave for about 30 seconds or until melted (a double-boiler method would also work). Your mix will be a bit gritty/crumbly, but all's well. Go on to step 4.
4. Using a rubber spatula, stir in vanilla.
5. Add eggs, one at a time and stir vigorously until smooth and shiny.
6. Now add the flour and blend until it is invisible, then give it a good 40 strokes (that's what the recipe says!)
7. If using nuts, add them now and stir a bit to combine.
8. Pour into pan and spread evenly.
9. Bake for 20-25 minutes, until a fork poked in the center comes out clean. 
10. Allow to cool for about 10 minutes before pulling the parchment out of the pan and lifting out the brownies, or place the whole pan in the fridge for a few minutes to speed up the process. 
11. Cut into bite sized squares and freeze in a ziplock if you're like me and need help curbing the urge to down them all with a big glass of milk. 

Fall Back

September Pizza

This weekend, in honor of my being thisclose to completing final revisions for a major fellowship application due in 9 days, I've decided to allow myself some time to update my digital cookbook. Judging by the Digest, you'd think I haven't made anything in the last couple of months, and that would suggest I've come up with a better coping mechanism for stress than baking and cooking. 

Neither is true.  

I just have this bad habit of wanting to set aside time to compose my blog entries, to add a little anecdote to remember the meal by, rather than just adapting a recipe, slapping on a couple of pictures and calling it a day. But you know what? Sometimes a quick post is better than letting the recipes pile up. 

Yes, the semester's been extra busy, but let's keep it moving, shall we?

Let's.


Oat and Maple Syrup Scones

Natural lighting really is as magical as they say it is.

Scones. I see them at Starbucks but never get them because I can't bring myself to pay so much for just one of something I could make several of for a fraction of the cost. Plus, who knows how long they've been sitting under that fluorescent glow?

So a couple of weeks ago, I made scones by combining two recipes (I didn't have enough of either set of ingredients) and hoped for the best. I enjoyed the results, and here they are, for your viewing, reading, and snacking pleasure.


Oat and Maple Scones
Adapted from Smitten Kitchen and The Joy of Baking


Ingredients
1 cup all purpose flour
1/2 cups whole wheat flour
1/2 cup rolled oats
1/2 cup butter (1 stick), cut into 1 inch cubes
1/4 cup skim milk
1/4 cup maple syrup
1 very heaped Tablespoon baking powder
1 heaped Tablespoon granulated sugar
1/2 teaspoon salt
1 beaten egg for eggwash


Directions
1. Preheat oven to 400 degrees F.
2. Whisk together all purpose flour, whole wheat flour, rolled oats, sugar, salt and baking powder in a large bowl. 
3. Using your fingers, combine the butter with the dry ingredients until the blend is breadcrumb consistency. 
4. In a small bowl combine milk and syrup, then add this to the dry ingredients.
5. Using a spoon or rubber spatula, combine the dough until it all comes together -- now you're ready to form the scones!
6. To form scones, roll out dough to a thickness of about 1.25 inches, and form into a circle. Next, cut into wedges (say, 8?) or whatever size you find appropriate. Just don't make them too thin or you won't get their characteristic quasi-fluffy rise. You could also use round cookie cutters if you prefer your scones biscuit-shaped. 
7. Separate the wedges a bit and place on a parchment lined pan. Brush on the egg wash for a golden finish.
8. Bake for 15 minutes, and please, as always, follow your nose! If it smells really good in the kitchen, it might just be time to take the goods out of the oven, regardless of what the directions say!