Monday, June 27, 2011

Cilantro-Lime (Brown) Rice


I love Chipotle. Love it. I wish I could make every item on their menu at home, but until I get the nerve to try and make my own burritos (I dunno, maybe it's the number of toppings and ingredients needed that's deterred me...), here's a recipe that is pretty much just like the rice they use inside. Incidentally, I usually ask the person preparing my burrito to omit the rice since beans + rice + all of the other delicious elements inside can make them a bit too filling, but I'll gladly make this again as a way to liven up a side dish. I'd go with a bit less salt next time (is it me, or is brown rice much more flavorful than white?), but I'm lovin' the brown rice in this instead of long grain white. 

Cilantro-Lime (Brown) Rice
Adapted from Skinny Taste

Ingredients
1 cup brown rice
2 cups water
1 teaspoon salt
3 teaspoons vegetable oil
3 Tablespoons fresh chopped cilantro
juice of 1/2 a lime
Directions
1. Place rice, water, and 1 teaspoon oil in a pot and bring to a boil on high heat. 
2. Once most of the water has boiled off, cover for about 15-20 minutes on low heat. Turn off the heat and leave covered for an additional 5 minutes.
3. In a bowl, combine lime juice, cilantro, and the rest of the oil. 
4. Throw in your cooked rice and toss together to combine.
5. Devour alongside your favorite protein, marveling at yourself all the while because you were able to recreate "fast food" at home.

Sunday, June 19, 2011

Brown Butter Banana-Strawberry Bread

Brown butter. If you don't know, you need to find out.

Facts:

A) Yesterday I (mostly) ran 4.4 miles, outside, by the Hudson. After a few weeks of running across the George Washington Bridge, I can tell you the road/blacktop on the Greenway is much easier on my joints (did I just say that?) than the metal bridge. I like it.

B) I've realized that you should never decide that you don't like a fruit or vegetable until you've had an organic specimen, or at the very least one that's at the peak of ripeness.  This fact has helped me discover a true love of tomatoes and several other fruits. Today's strawberries may not have been organic, but all I know is that I really thought I hated those berries until I got these yesterday.

C) There are 16 Tablespoons in 1 cup, 8 Ts in 1/2 cup, and 4 Ts in 1/4 cup. Good to know. Especially when you've misplaced your 1/4 cup.

D) Brown butter smells soooooooooooo good! I see more (but not too much!) of it in my future.

About this recipe:

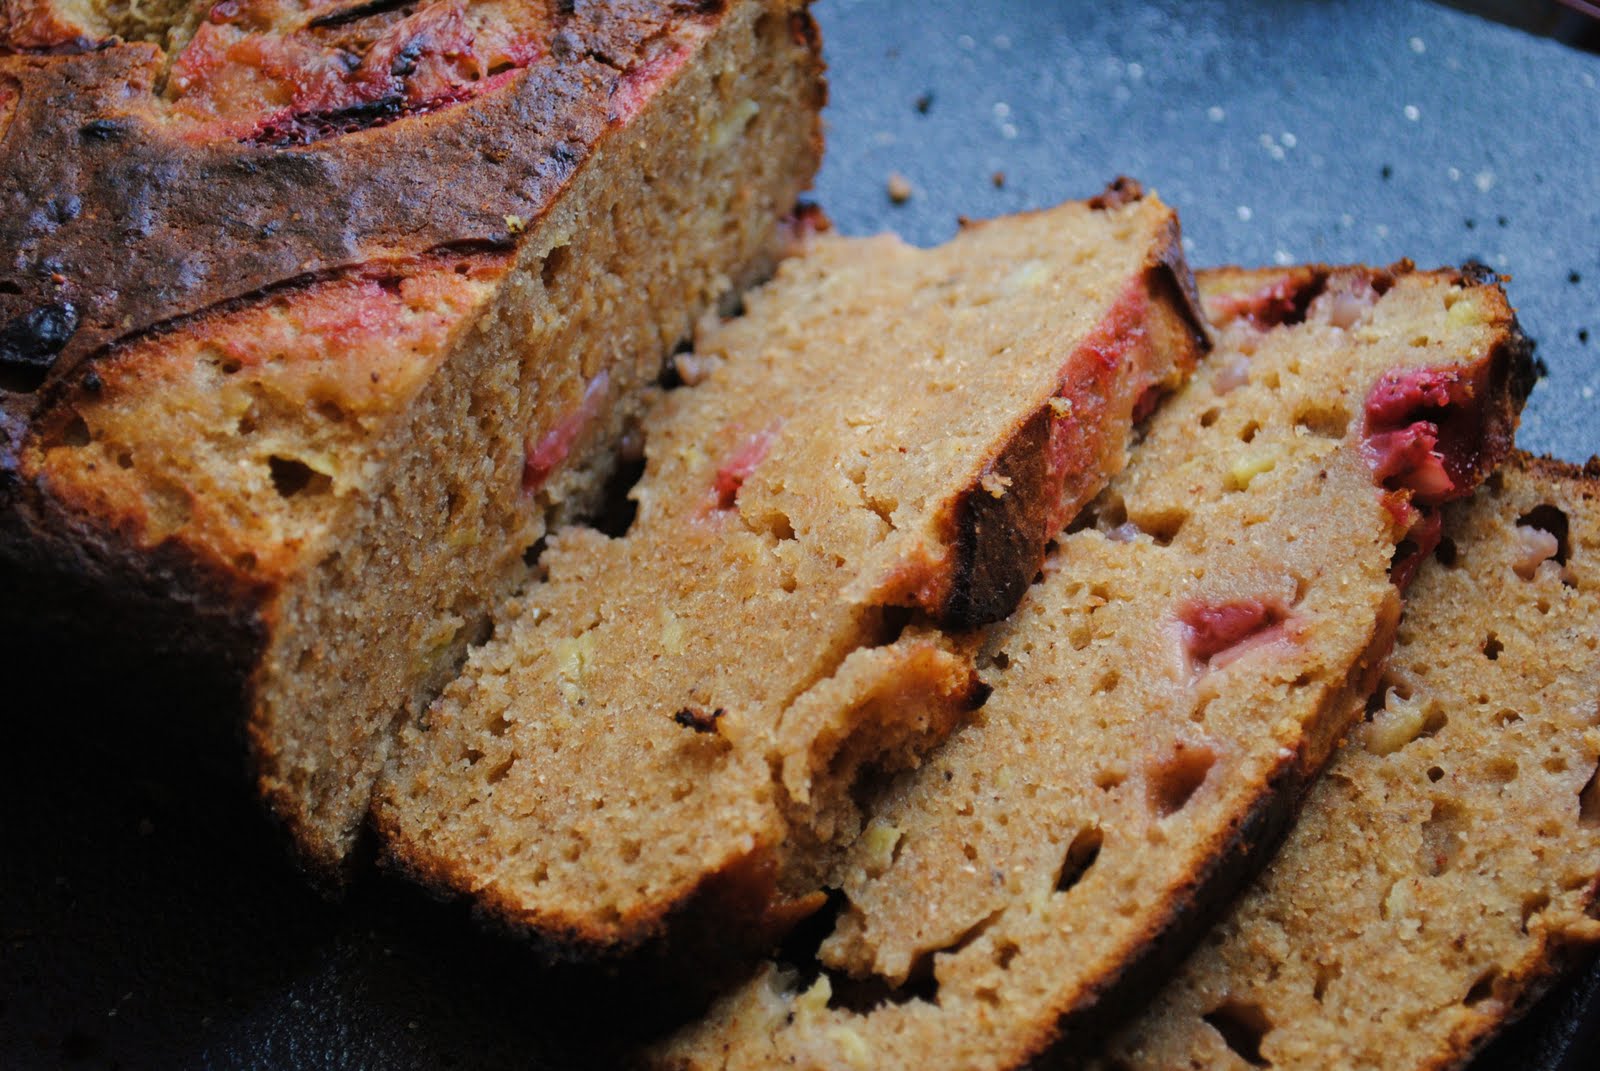
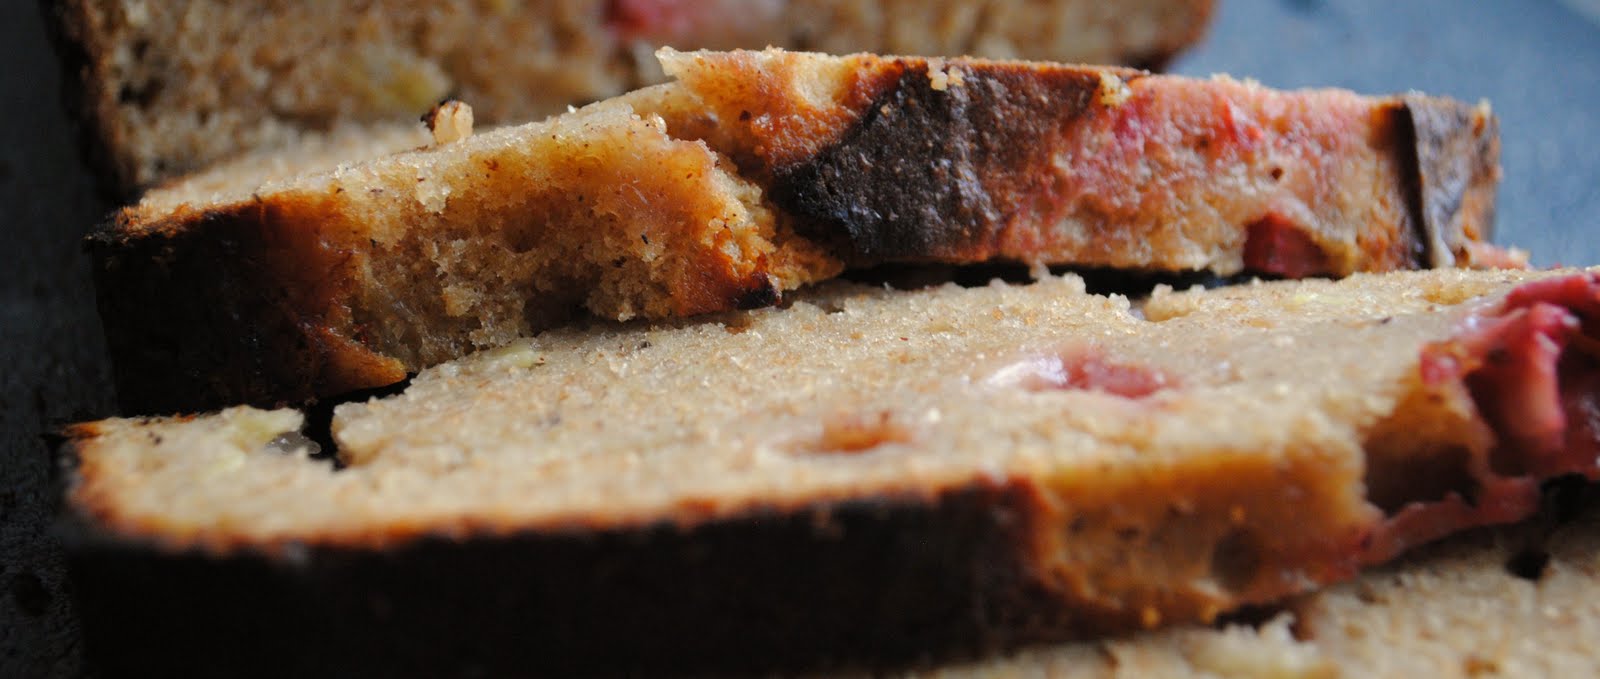
I love the tanginess the strawberries add to this version of banana bread, and I'm really digging the almost cake-like moistness. Knowing that I'd gladly consume all of this in one day, I did the right thing and sliced up the loaf, wrapped it in plastic and aluminum foil. This tastiness is freezer bound to be rediscovered as a surprise snack in a few weeks when I feel I've earned it.

I think next time I might cut down on the fat and sub in some apple sauce to compensate for the lost moisture I'd expect as a result, though even then, I think this could have been a bit sturdier and still been great. 


Brown Butter Banana Strawberry Bread
Adapted from Joy the Baker 

Ingredients
1.5 sticks/6oz/12 Tablespoons of butter, which will be melted and browned to about 1/2 cup
1 1/4 cup mashed banana (I used 3 medium bananas)
1/2 cup diced strawberries plus 1 very thinly sliced strawberry for topping (I think I went with more like a cup of strawberries)
 
Dry Ingredients:
1 cup all purpose flour
1 cup whole wheat flour
3/4 cup brown sugar
3/4 teaspoon ground cinnamon
The original recipe calls for 1 teaspoon baking soda and 1/2 teaspoon salt, but About.com told me I could sub in 2 teaspoons baking powder and omit the salt, so I did that (I had no baking soday)
Wet Ingredients:
2 large eggs
1 teaspoon vanilla extract
1/4 cup plain nonfat yogurt or buttermilk (I used yogurt)

Directions
1. Preheat your oven to 350 degrees F, and grease and flour a 9X5-inch loaf pan and set aside for later. (Since I'm using a glass pan, I reduced the temp to 325F)
2. In a saucepan, melt butter over medium heat. The butter will foam and sputter at increasing rates as it melts, though this will slowly subside and evenually your butter will be browning. If you see some brown specks, don't worry! This is exactly what you want. Once you've got a lot of those lil specks, and you begin to smell a delectably  nutty scent, remove from heat and place in a bowl so that it can cool (I put mine in the fridge to help the process -- don't worry, it's not gonna solidify like melted butter would).
3. Since I knew I'd be making this since yesterday, I premixed the dry ingredients in a large bowl. If you lacked this foresight, do so now. 
4. In a medium bowl, whisk together wet ingredients. 
5. Whisk in mashed bananas as well.
6. Once the butter has cooled, mix those into your wet ingredients too.
7. Add all your wet ingredients to your dry ingredients, folding together using a spatula until just combined (i.e. don't overstir). 
8. Fold in the diced strawberries.
9. Pour your batter into the prepared pan, and top with the thinly sliced strawberry. 
10. Bake for about 50 minutes to an hour, until a toothpick/ knife comes out clean. (Now, you gotta be careful whenever you bake in an oven you're not used to -- even at a lower temperature, I only baked mine for about 30 minutes before it was time to let it out, so trust your nose! If it smells amazing, you're probably almost done baking
11. Remove from oven and allow to cool for 15 minutes before turning out.

Sunday, June 12, 2011

Spicy Sweet Tater Soup

Also, I lied

Or, at the very least, I forgot that I actually had made two soups, one more solid than the other, and tucked the recipes away but never blogged about them. So here's to the last recipe I made months ago and never posted. I think.

Back story: Winter in Maryland was pretty rough (though not as ridiculously ice-cold as it was then in NYC), so one Sunday evening in January I decided to make two pots of soup, one tomato, one sweet potato.  

The tomato soup wasn't my favorite (maybe because I didn't have all of the ingredients I needed), so I'll save that post for when I've found The One. But the Spicy Sweet Potato Soup? Incredible. Below you'll find that recipe.

Kitchen Tip: I found it really convenient to then pour in a serving of the soup into quart sized freezer bags to thaw throughout the winter for a quick lunch or dinner. I also figured out a cool trick: freeze them laying flat; this way you can stand them up in your freezer like little files or folders-- this is also helpful since it lets you sneak them in between other bulkier items. Just sayin. It worked for me.

Spicy Sweet Potato Soup 
Adapted from Allrecipes  

Liner Notes: I love this soup. The spiciness is right up my alley, the sweetness isn't cloying, and the starchiness just makes this the perfect comfort on a cold night (extra warm because of the chipotle I added). 

Ingredients
2 large sweet potatoes, peeled and cubed
1 Tablespoon butter
1 onion, sliced
2 cloves of garlic, sliced
4 cups of chicken stock
1/2 teaspoon ground cumin
1/4 teaspoon crushed red pepper flakes
approximately 1/4 cup smooth peanut butter
juice of 1 lime
2 Tablespoons chopped cilantro
salt, to taste
my addition (and why I love this soup): a heaping spoonful of chipotle pepper and adobo sauce

Directions
1. In a large pot, melt butter over medium heat. Add onion and garlic and cook for approximately 5 minutes, until just softened.
2. Add sweet taters, chicken stock, cumin and red pepper flakes and bring to a boil. 
3. Once boiling, reduced to a simmer and cover for 15 minutes, until taters are soft. 
4. Puree the soup in batches using a blender.
5. Return soup to pot, whisk in peanut butter and heat through. 
6. Add in lime juice, salt, and chipotle pepper and adobo sauce.  
7. Ladle into bowls, top with a bit of cilantro, and enjoy the hot, spicy warmth as it takes you over.

Squash, Mac & Cheese

While not regularly featured in my cooking, this is recipe I really like to make when I'm in the mood to add in veggies I don't usually use. Now, you can't go into this expecting macaroni and cheese as you know it. You gotta be open minded, and know that this will taste much more like veggies than cheese, but that's OK. It's good. Seriously.

The original recipe by Ellie Krieger is a bit more involved, only in that it asks for a few more ingredients which I usually don't have on hand. The following is what I tend to do on those days when I decide to buy frozen squash but nothing else from the original recipe, knowing full well that I can still make something tasty that was inspired by it. I like it because it allows me to eat a veggie I wouldn't usually eat, while reminding me a bit of that once-a-year indulgence, mac n cheese. Plus, the way I make it has that "little bit of this, little bit of that" attitude I enjoy in cooking.

Squash Mac & Cheese

Ingredients
1 package of frozen squash
1 cup skim milk
2-3 cups pasta, depending on how much you have and how saucy you want it
a hefty handful of grated cheese (I used meunster today)
salt, to taste
ground cayenne pepper, to taste
a few bread sticks to stand in for breadcrumbs

Directions
1. Preheat your oven to 350 degrees F. 
2. Boil pasta for 5-8 minutes so that they are cooked but still sturdy (they'll be going into the oven and you don't want them to fall apart)
3. In a saucepan combine frozen squash and milk and cook over low heat until defrosted. Once it's broken down, increase heat to medium until almost a simmer, then remove from heat.
4. Add cheese, salt and cayenne.
5. Add your drained pasta to the squash mix, then place in a greased pan (today I used a glass bread loaf pan, but something flatter/wider would work even better).
6. Top with crushed bread sticks for a crunchy finish before placing in the oven to bake for about 30 minutes, plus 3 minutes under the broiler.

Thursday, June 2, 2011

Bulgur Wheat and Lentils

This might just be the last old recipe I've left collecting dust in the draft section of 'Chefski Digest. That doesn't mean I've gone through all my saved selections, but this is something I made for the first time well over a year ago, keep coming back to, but had yet to post. 

Since beginning my cooking and baking adventures in college, one of my goals has been to cook more varied meals than the ones I'd grown up with, especially if it means increasing the nutritional value. I'm always interested in learning which foods I should consider incorporating into my diet, and I've been increasingly interested in finding more non-meat options to include in each meal. I found this dish after searching for recipes using bulgur wheat, which I'd recently learned is a great source of fiber and a nice substitute for white rice (barley being another favorite). 

What I love most about it is that after you make it once or twice it really lends itself to spontaneous cooking; that is, you can put in what you like, leave out what you might not have on hand, and you'll get the basics of it right each time. I'm glad to have the recipe on the blog now, but I'm even more glad that I can just pick up and make this in whatever way I am inspired on that particular day. What's more, this dish tastes great on day two, which makes it perfect for lunch.  

Herbed Bulgur-Lentil Pilaf
Adapted from Ellie Krieger's recipe on foodnetwork 

Ingredients
1/2 cup green lentils
1 cup bulgur wheat
4 cups low-sodium chicken broth (water will also work here, or veggie broth)
1 Tablespoon plus 2 teaspoons olive oil
1 small red onion, diced
1 bell pepper (any color will do, though orange and yellow look especially lovely), seeded and diced
3 Tablespoons fresh parsley, chopped 
2 Tablespoons fresh basil, chopped
2 Tablespoons fresh chives, chopped
1 teaspoon lemon zest
1 Tablespoon lemon juice
1/2 teaspoon salt
1/4 teaspoon black pepper

Directions
1. In a small saucepan, bring 2 cups of broth with lentils to a boil. Boil for five minutes then reduce heat to a simmer and cook until lentils are tender, which is about 30 minutes (most of the liquid will have been absorbed/evaporated by then as well). Once the lentils are cooked you'll want to drain any excess liquid, but meanwhile...
2. In another saucepan, bring 2 cups broth and your bulgur wheat to a boil. Reduce heat and simmer until most of the liquid is gone and the wheat is tender, which will be in about 15 minutes. Remove from heat and fluff with a fork. 
3. Add lentils to the bulgur. 
4. Heat 2 teaspoons of oil in a skillet over medium heat. Cook onions until tender, about 5 minutes. Add peppers and cook until those are tender, about 5 more minutes, then add the onion-pepper mix to the bulger-lentil.s
5. Stir in parsley, basil, chives, lemon zest, juice, 1 Tablespoon olive oil, salt and pepper. Delicious. 


Bulgur-lentil pilaf and homemade turkey burger (a recipe for another day)